
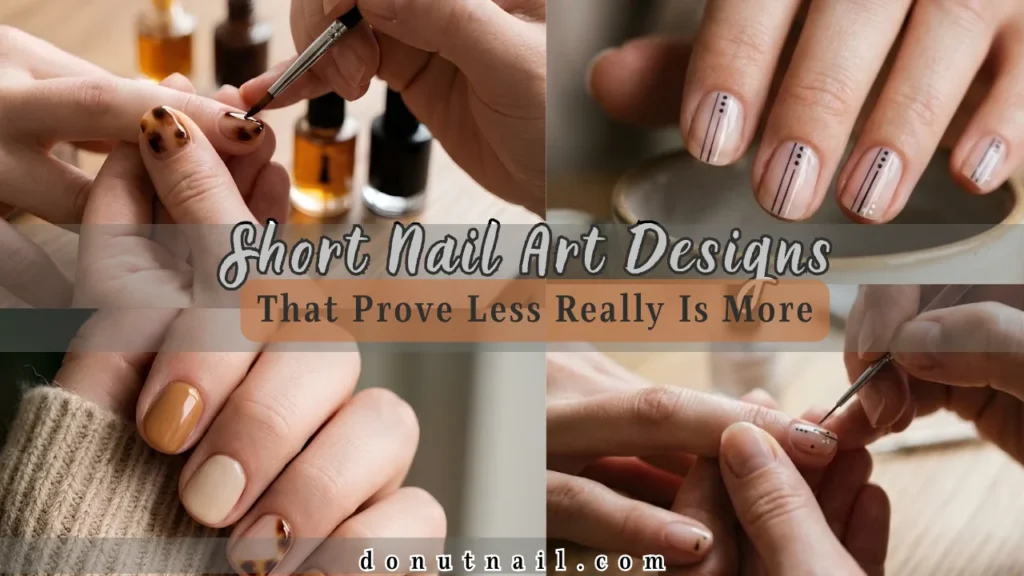
Discover chic short nail art designs that prove less really is more. Learn minimalist techniques, color palettes, prep tips, and pro tricks for small nail beds.
For years, dramatic nail art felt synonymous with extreme length. Sculpted acrylics, sharp stiletto tips, and extended coffin shapes dominated beauty feeds, leading many to believe that intricate or stylish manicures were reserved strictly for long nails. If you kept your nails short for work, hobbies, sports, instrument playing, or simply personal comfort, you might have felt limited to single-color polish or bare buffed nails.
That perception has completely flipped. A shorter nail bed provides one of the cleanest, most sophisticated backdrops in modern beauty. Far from being a limitation, short nails offer an intentional, refined aesthetic that looks effortlessly chic. They fit naturally into daily life, eliminate the fear of accidental breaks, require a fraction of the maintenance, and look tailored in every setting from casual weekends to formal boardrooms.
The secret to stunning short nail art lies in understanding scale and proportion. When you swap oversized, busy motifs for thoughtful negative space, ultra-fine lines, and understated accents, your hands take on an elegant, curated feel. Less truly is more when every detail is placed with purpose.
Whether you have naturally petite nail beds, keep your nails clipped short for practical reasons, or are rehabilitating natural nails after years of heavy extensions, these short nail art designs and techniques will prove that minimalism delivers maximum impact.
The Geometry of Short Nails: Why Proportion Changes Everything
Painting short nails requires a distinct perspective on visual weight. On a two-inch nail extension, an artist has ample room to layer gradients, 3D charms, line work, and shading without overwhelming the finger. On an active-length natural nail, that same combination looks cluttered and can visually shorten the hand.
Mastering nail art on shorter beds comes down to three structural concepts:
- Negative space as an active design element: Leaving portions of the raw or sheer-tinted nail visible allows the eye to breathe. Negative space tricks the viewer into perceiving more surface area than actually exists, preventing the design from feeling cramped.
- Vertical visual flow: Horizontal elements, such as thick bands across the middle of the nail, visually slice the plate in half and make fingers appear wider. Vertical elements, such as centered pinstripes, offset dots, or tapered lines, direct the eye upward toward the fingertip to create an elongating silhouette.
- Micro-scale detailing: Nail art brushes designed for standard applications often carry too much polish for petite nail beds. Scaling down the tools to ultra-fine stripers and micro dotting tips ensures lines stay crisp rather than blurring together into a puddle of pigment.
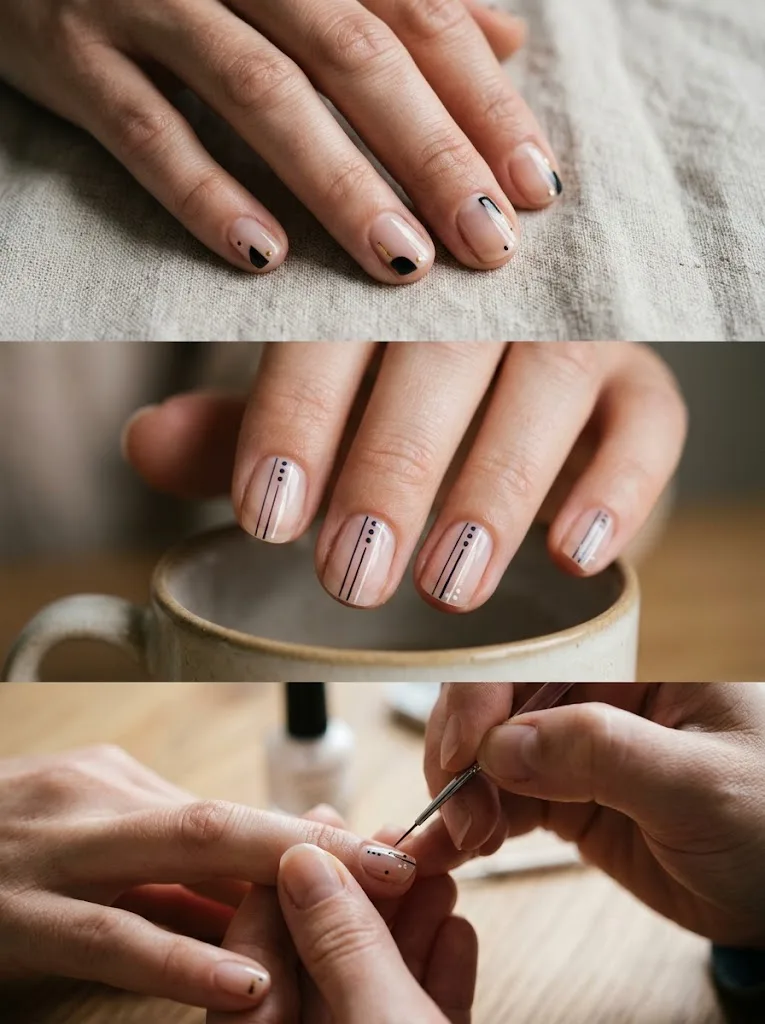
When each accent is scaled to complement your natural anatomy rather than fight it, shorter manicures look deliberate, elevated, and strikingly modern.
[Related article: https://donutnail.com/master-ombre-nail-art/]
Choosing the Best Nail Shape for Short Manicures
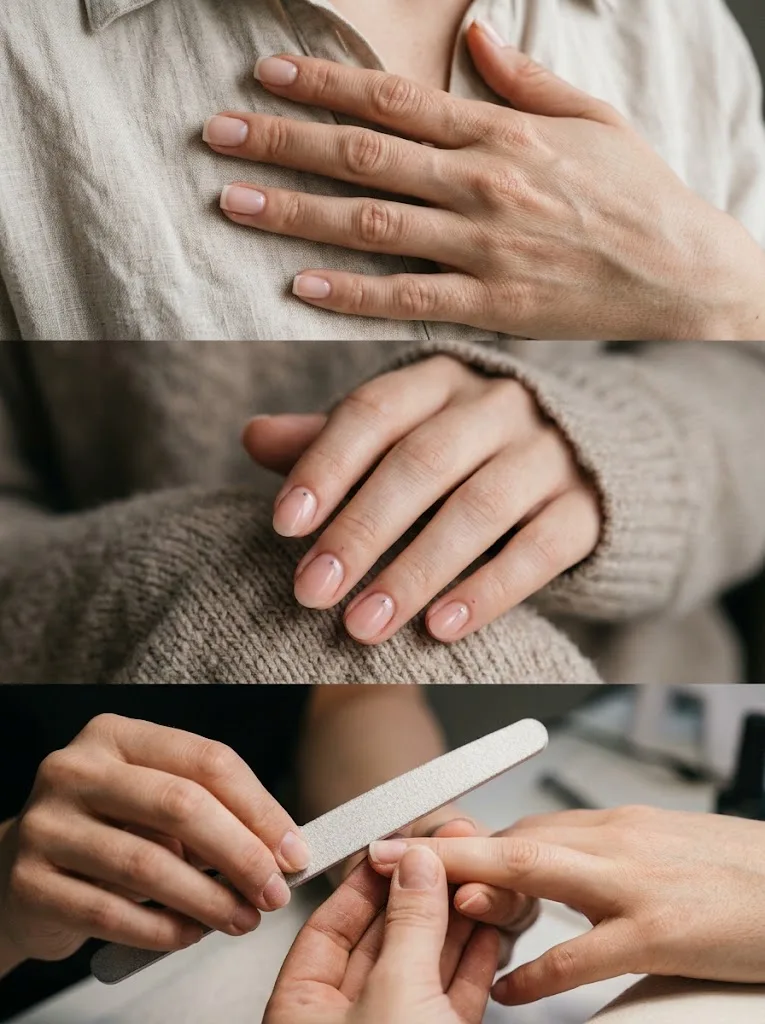
Before applying polish, establishing the right nail perimeter creates the framework for your entire look. The best shape for short nails works in harmony with your natural cuticle line and finger shape.
The Soft Squoval
A squoval shape combines the flat, straight edge of a square nail with softly rounded corners. It is arguably the most flattering and durable shape for active-length nails. The straight edge provides structural strength across the stress point of the free edge, while the rounded corners prevent snags on knitwear and hair. If you have wide or flat nail beds, a soft squoval introduces crisp, balanced symmetry for geometric and French designs.
The Gentle Round
Following the natural curve of your fingertip, a gentle rounded edge softens the perimeter and helps fingers look slender. This silhouette works exceptionally well for petite or narrow nail beds. Because it has no sharp corners, rounded shaping minimizes chipping along the sides, making it a reliable choice for sheer jelly bases, delicate dots, and soft floral accents.
Shapes to Avoid on Short Nails
While dramatic shapes like stiletto, coffin, or sharp almond look striking on long enhancements, attempting them on short natural nails often leads to frustration. These shapes require sufficient free edge to taper properly. Filing aggressively inward on short nails removes the structural support from the sidewalls, which leaves the nail plate vulnerable to painful tears, peeling, and uneven growth.
10 Minimalist Short Nail Art Designs That Prove Less Is More
These curated design concepts demonstrate how restraint, precision, and clever placement transform shorter nails into striking, wearable art.
1. The Micro French (Baby French)
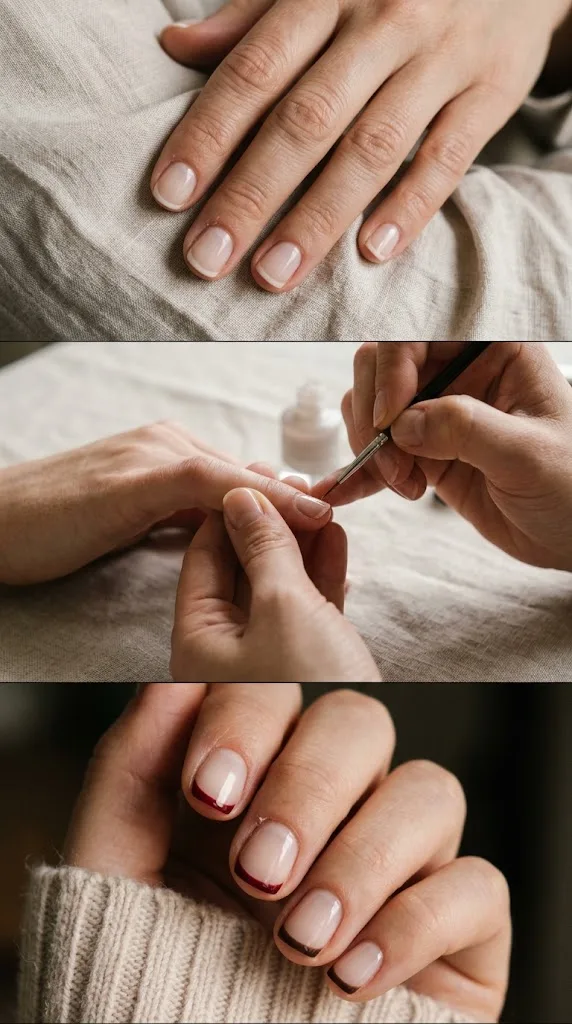
Traditional French manicures with thick white bands can visually cut a short nail plate in half, making the nail appear stubby. The micro French solves this problem by reducing the smile line to a whisper-thin ribbon that hugs the absolute perimeter of the free edge.
- The Palette: A milky, semi-sheer base coat paired with a contrasting tip. While crisp white remains a classic choice, swapping it for espresso brown, olive green, cherry red, or reflective silver chrome feels distinctly fresh.
- How to achieve it: Avoid using the wide brush from the polish bottle. Instead, use an ultra-thin 7mm striper brush. Lightly anchor your pinky finger against your work surface for stability, start at the outer corner of the nail, and pull the brush smoothly along the edge in a single, fluid arc.
- Pro Tip: If your natural free edge has an uneven white line underneath, apply a sheer, semi-opaque nude base to neutralize the natural line before painting your micro tip.
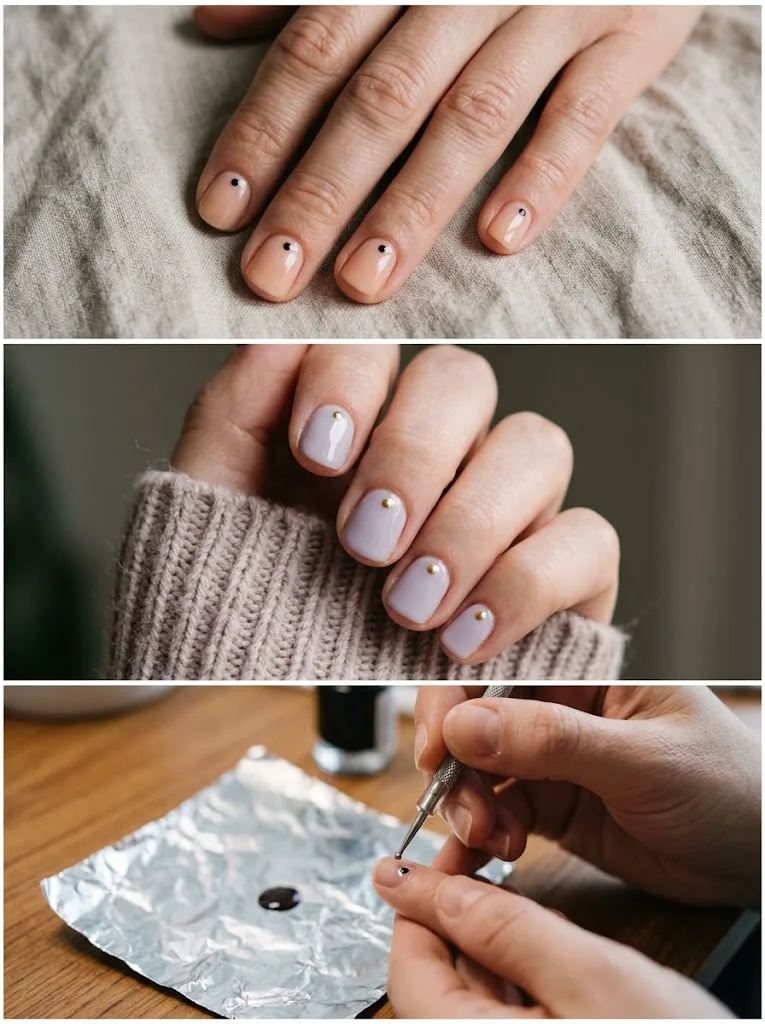
2. Floating Single-Dot Manicures
A single dot placed intentionally on each nail is proof that the simplest ideas are often the most captivating. This design feels architectural, editorial, and takes mere minutes to execute once you master placement.
- Placement Strategy: The most flattering spot is centered approximately two millimeters above the cuticle line. Placing the dot close to the base anchors the design and leaves the rest of the nail open, emphasizing the clean curve of the nail plate.
- Color Combinations: Try a sheer peach-nude base with a jet-black dot for high contrast, or a pale lavender base with a metallic gold bead for a touch of warmth.
- Technique: Dispense a small drop of polish onto a piece of foil. Dip the smallest end of a metal dotting tool or the tip of an unbent bobby pin straight down into the polish, then tap it gently onto the nail without dragging. Lift straight up to create a perfect circle.
3. Negative-Space Cuticle Arcs (The Reverse French)
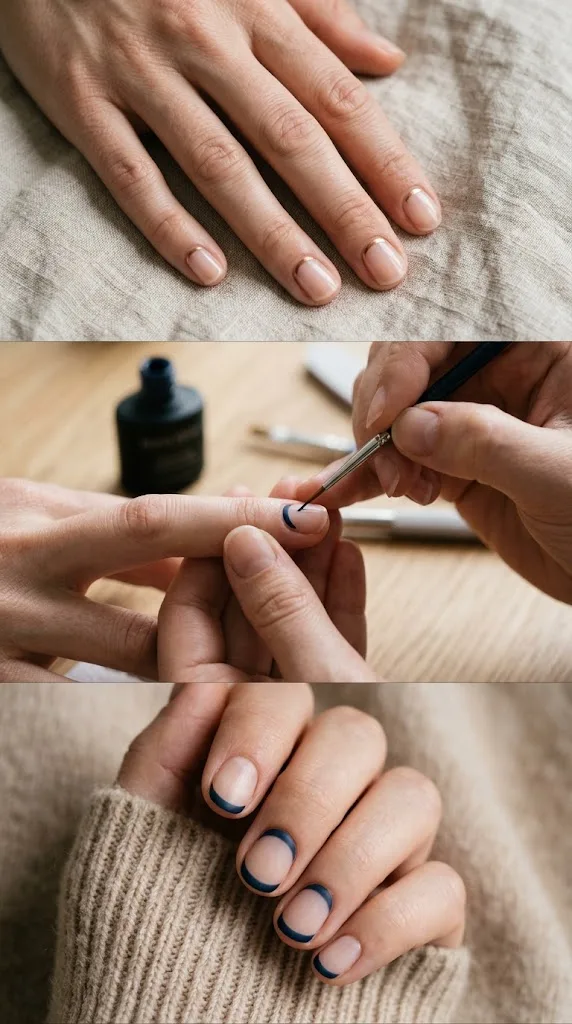
Instead of highlighting the tip of the nail, this style traces the crescent arch at the base of the nail bed, often referred to as the lunula or cuticle line.
- Visual Effect: By framing the bottom curve while leaving the rest of the nail either bare or painted in a contrasting block, you draw attention to the start of the nail plate, which lengthens the look of the fingers.
- Wearability: This design grows out exceptionally well. Because the accent hugs the base or leaves a small negative-space gap, new nail growth blends in naturally without showing an obvious gap.
- Color Idea: Combine a bare, buffed natural nail with a metallic bronze or matte navy arc hugging the lower perimeter.
[Related article: https://donutnail.com/10-nail-art-hacks/]
4. Fine Vertical Pinstripes
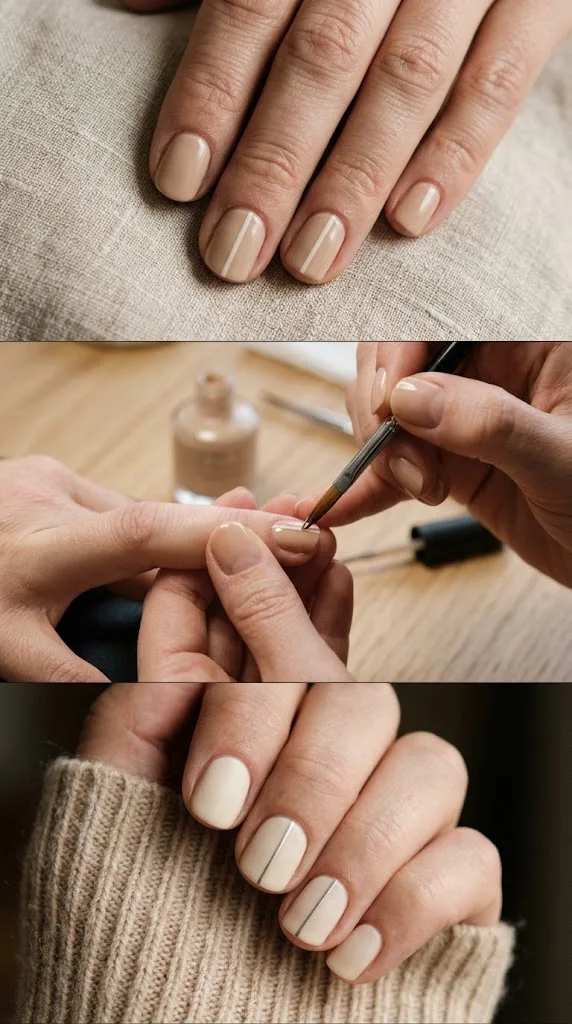
If you want to create the optical illusion of longer nail beds, vertical line work is your best ally. A single, hair-thin line running down the center or slightly offset toward one side creates an immediate vertical sightline.
- Styling the Look: You do not need to paint lines on all ten fingers. Applying the pinstripe to the middle and ring fingers while keeping the others solid creates a balanced, curated accent set.
- Execution: Use a long-haired striper brush (9mm to 11mm). Longer bristles hold straight lines much better than short brushes because the length of the hair naturally resists bending as you pull it down the nail plate.
- Finishing Touch: Try a tone-on-tone approach, such as an off-white line over a warm beige background, or a micro-fine chrome line over a matte cream base.
5. Asymmetrical Organic Swooshes
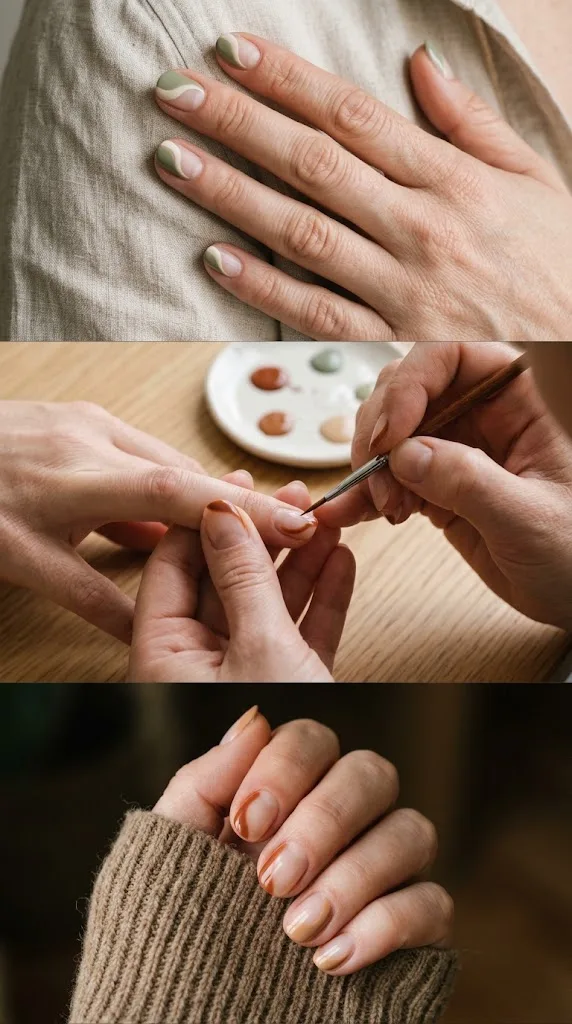
Symmetry can sometimes emphasize natural irregularities in short nails, such as slightly curved finger shapes or uneven nail beds. Asymmetrical, organic swooshes bypass this issue entirely by celebrating fluid, freeform curves.
- The Concept: Gentle, curving waves that swoop across one side of the nail plate, leaving the opposite side completely bare.
- Color Harmony: Earthy and muted tones excel here. Pairing sage green with creamy ivory, or burnt sienna with warm sand, produces an understated palette that works across all seasons.
- Why It Works: Leaving a large portion of the nail unpainted maintains the airy feel required for short nails, while the sweeping motion adds energy and movement.
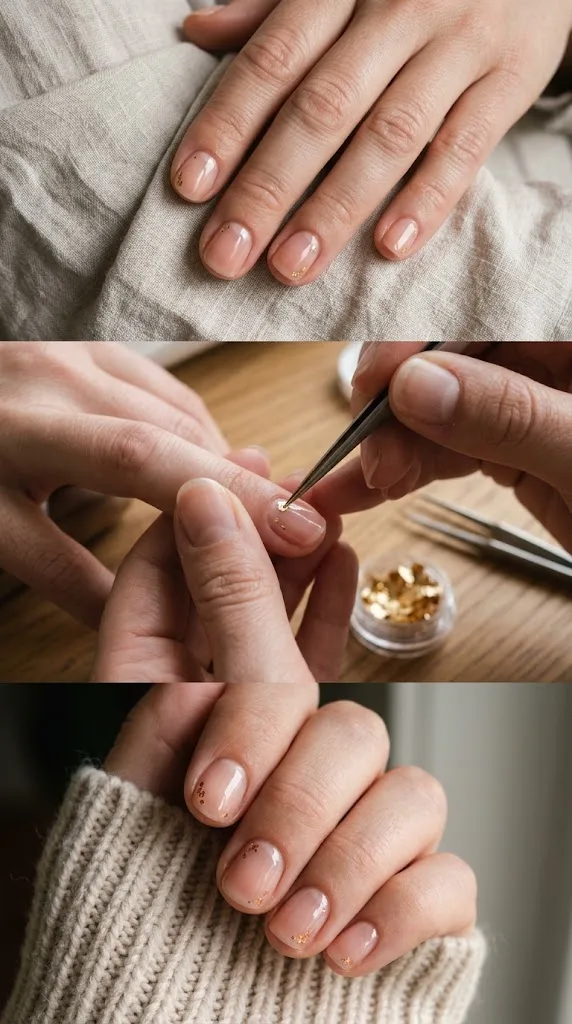
6. Sheer Glazed Washes with Micro-Foil Accents
If hand-painted line art feels intimidating, texture and light reflection can deliver minimalist impact without requiring a steady hand.
- The Technique: Start with a sheer, buildable jelly polish that allows your natural nail half-moon to peek through softly. While the second coat is still tacky, use tweezers to press tiny, irregular flecks of gold or copper leafing near the cuticle or along one lateral edge.
- Visual Balance: Keep the foil flecks minuscule—roughly the size of a pinhead. Clumping large chunks of foil across the entire nail plate makes short nails look crowded, whereas pinpoint flecks catch the light like fine jewelry.
- Sealing: Finish with a generous layer of high-gloss top coat to ensure the foil sits completely flush with the nail surface.
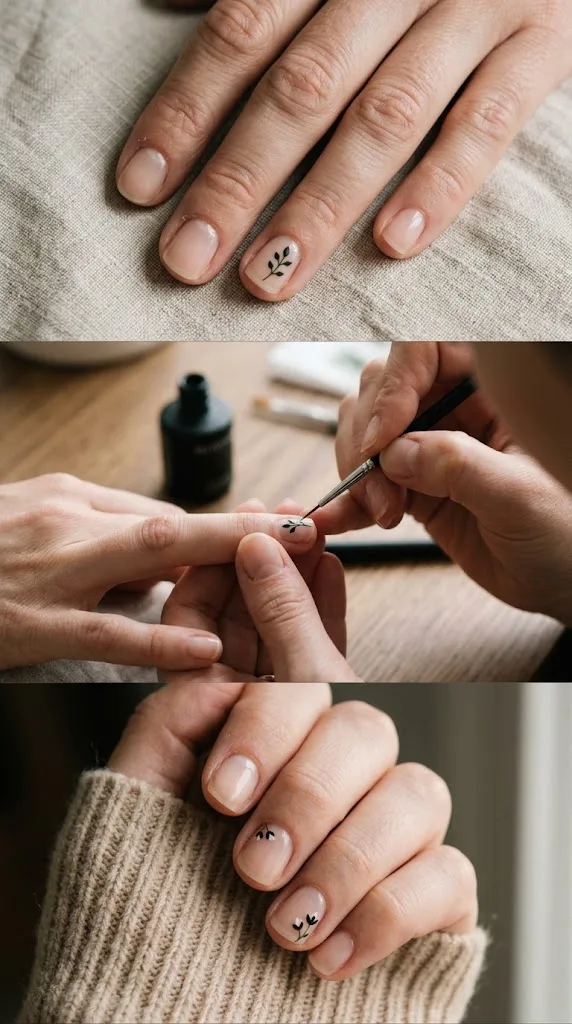
7. Petite Botanical Silhouettes
Floral manicures often get a reputation for being busy or sweet, but reducing botanical art to clean silhouettes turns it into sophisticated illustration.
- The Design: A single delicate stem with two or three tiny leaves painted on one accent nail, or three micro-petals tucked discreetly into a corner.
- Keep It Flat: Rather than layering multiple shades to create 3D petal depth, use a single opaque shade, like forest green, rich black, or chalk white, over a bare or sheer base.
- Scale Check: Ensure no single leaf or petal occupies more than one-fourth of the total nail plate area. Keeping the scale dainty preserves the minimalist aesthetic.
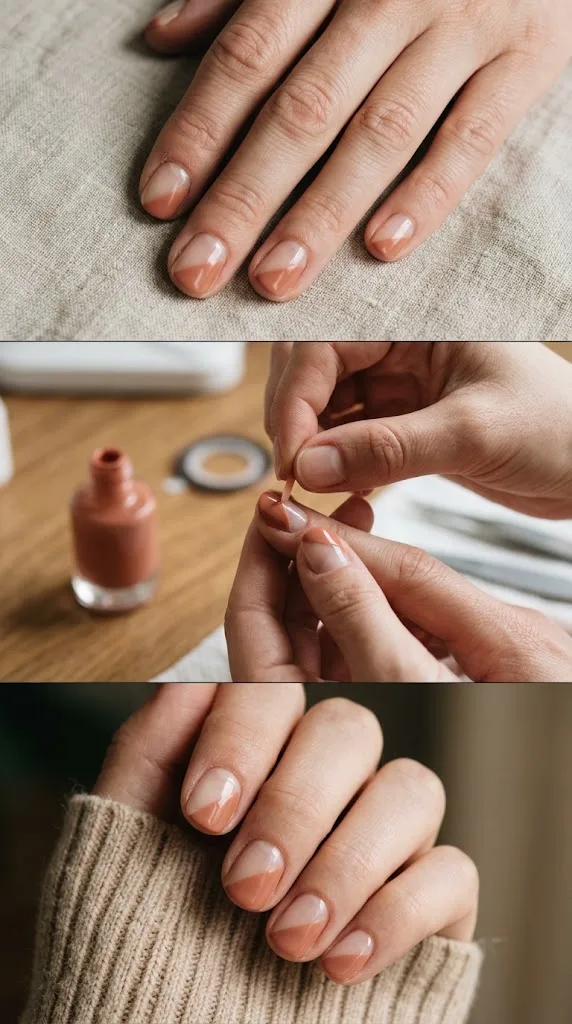
8. The Diagonal Negative-Space Split
Color blocking looks striking on short nails when it utilizes diagonal angles rather than rigid horizontal lines.
- The Layout: Section off the nail diagonally from the lower third of one sidewall up to the opposite tip. Paint one side in an opaque, creamy shade and leave the other side bare or coated in sheer gloss.
- Clean Lines: Nail striping tape is invaluable here. Apply the tape firmly across thoroughly dried base polish, paint your contrasting shade over one half, and immediately peel the tape away while the polish is still wet to reveal a razor-sharp edge.
- Palette Pairing: A muted terracotta paired with a clear, glossy base creates an architectural contrast that looks clean and contemporary.
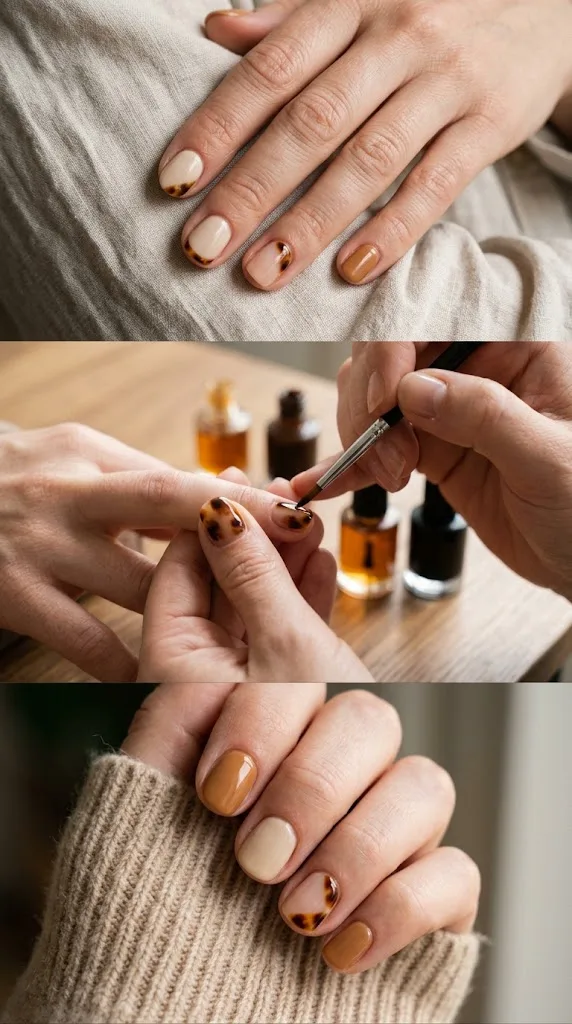
9. Micro Tortoiseshell Accents
Tortoiseshell is a timeless pattern with rich depth and warmth. While coating an entire set of short nails in dark tortoiseshell can sometimes look heavy, utilizing it as a micro accent brings high-end style to short nails.
- Placement Ideas: Confine the tortoiseshell pattern to a micro French tip, a single diagonal corner, or a small geometric patch on an accent nail.
- The Layering Trick: Tortoiseshell relies on layering sheer amber jelly polish with soft, feathered patches of rich chocolate brown and black. Layering sheer and dark tones gives the design its iconic dimensional look without requiring thick coats of paint.
- Pairing: Balance the rich amber patterns with creamy beige or warm caramel solid nails on the remaining fingers.
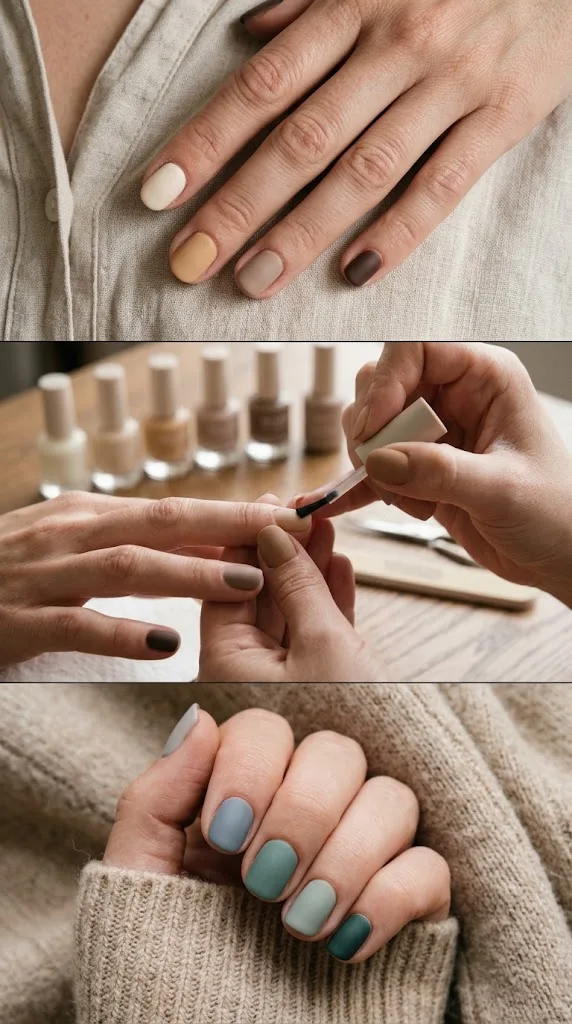
10. The Muted Tonal Gradient (Skittle Minimalist)
Who says nail art requires painting patterns? A curated tonal gradient—often called a “skittle manicure”—uses five complementary, muted shades across your fingers to turn color harmony into wearable art.
- The Secret to Minimalism: Avoid high-contrast rainbow palettes. Instead, pick a single color family and vary the depth across five fingers. For example, transition from ivory, to sand, to camel, to warm taupe, to rich espresso.
- Cool-Tone Alternative: Soft dove grey, slate blue, eucalyptus green, muted sage, and deep pine.
- The Finish: A velvet-matte top coat looks especially stunning on tonal gradient sets, softening the color transitions and lending an editorial, modern finish to short natural nails.
[Related article: https://donutnail.com/15-bold-black-nail-art/]
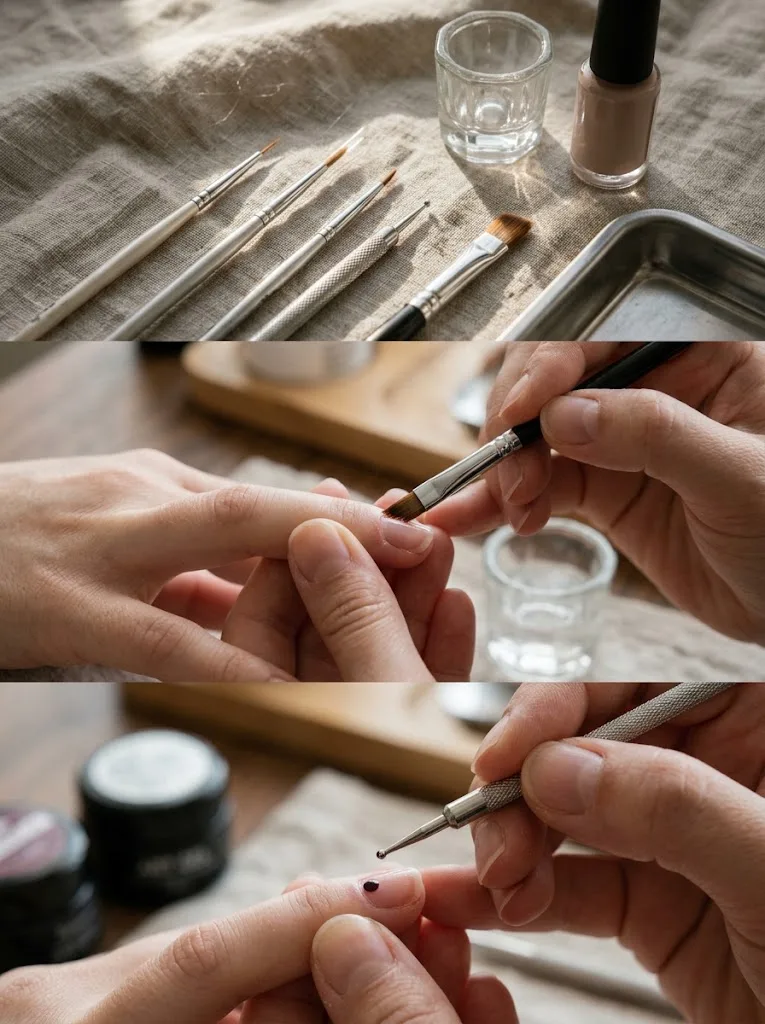
Essential Tools Tailored for Small Nail Beds
Attempting intricate work with the wide, bulky brushes included in standard polish bottles is the primary reason DIY nail art can feel frustrating on short nails. Investing in a few precision tools transforms your control:
- Short-Bristle Detailer Brush (5mm to 7mm): Ideal for painting controlled shapes, micro petals, and curved accents. The shorter hair length prevents the brush from flexing too far out of your intended path.
- Long Striper Brush (9mm to 11mm): Perfect for razor-thin pinstripes and smooth micro French smile lines. The length of the bristles acts as a stabilizer, gliding in straight lines across the curved nail plate.
- Micro Dotting Tools: Look for double-ended metal dotting tools with ball tips ranging from 0.5mm to 1.5mm. Standard dotting tools are often too large for small nails, resulting in dots that take up too much space.
- Pure Acetone and a Flat Angled Cleanup Brush: Precision nail art is defined by clean borders. A dense, acetone-resistant synthetic cleanup brush allows you to erase minor mistakes and sharpen cuticle lines instantly.
- Highly Pigmented Art Gel or Lacquer: Standard sheer polishes require multiple coats to show up, which builds unwanted thickness. Art polishes and heavily pigmented cream polishes allow you to achieve opaque lines in a single stroke.
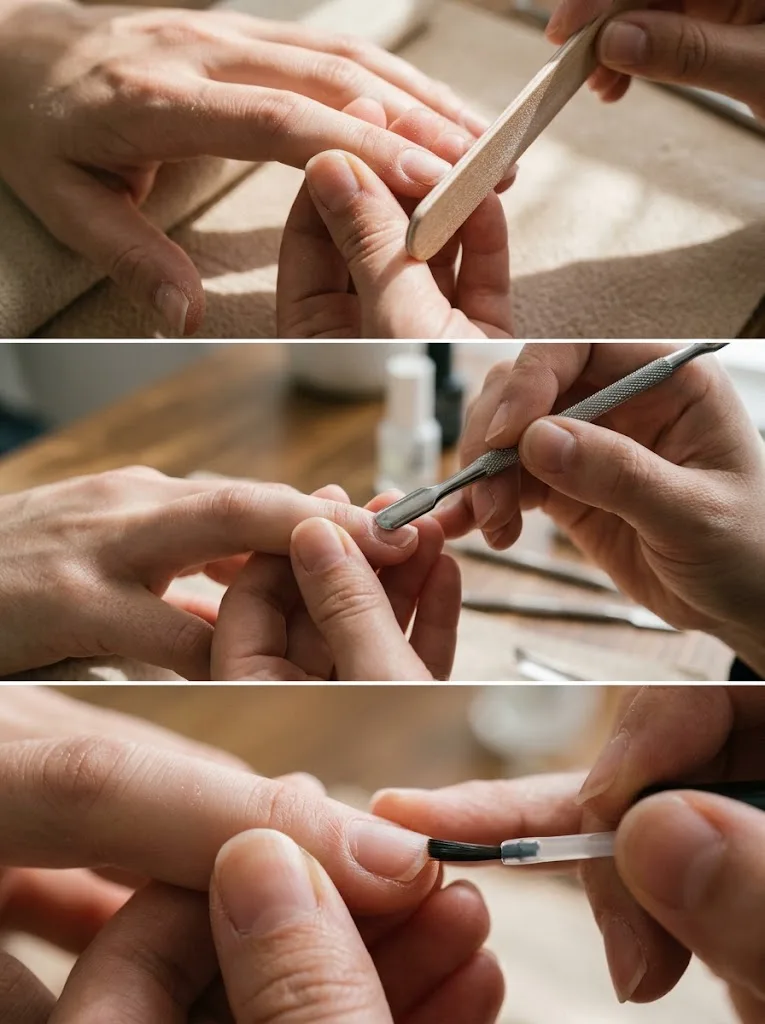
Step-by-Step Prep Protocol for Short Nails
Because short nails feature less surface area, imperfections in shaping or cuticle prep stand out much more prominently. Taking the time to properly prep your canvas ensures your minimalist art looks clean, intentional, and lasts for days.
Step 1: Shape on Completely Dry Nails
Never file your nails immediately after washing your hands, bathing, or showering. Water softens the keratin layers of the nail plate, making them flexible and prone to splitting or peeling under the friction of a file. Use a gentle 240-grit wooden or glass file, working in one direction from the outside corner toward the center. Avoid aggressive back-and-forth sawing, which creates micro-frays along the free edge.
Step 2: Clear the True Cuticle (Not the Living Skin)
A common mistake in at-home manicures is confusing the eponychium (the living rim of skin protecting the nail matrix) with the true cuticle (the thin, whitish layer of dead cellular tissue clinging directly to the nail plate).
Apply a liquid cuticle remover for sixty seconds to soften this stubborn buildup. Using a stainless steel cuticle pusher or an orangewood stick, gently scrape the dead residue off the surface of the nail plate. Never nip living skin; only trim loose, jagged hangnails that pose a snagging risk. Clearing the plate gives you extra surface area and prevents polish from lifting at the base.
Step 3: Dehydrate and Balance the Plate
Natural sebum, lotion residues, and filing dust prevent base coats from adhering properly. Wipe each nail clean with a lint-free wipe saturated with 90% isopropyl alcohol or pure acetone. Pay close attention to the lateral sidewalls and the proximal nail fold where oils gather.
Step 4: Apply a Ridge-Balancing Base Coat
If your short natural nails have natural vertical ridges, fine lines and geometric designs can warp as they cross over uneven grooves. A thin coat of ridge-filling base coat evens out the terrain, providing a smooth canvas for your detail work.
Step 5: Master the Controlled Polish Stroke
To avoid flooding the cuticles on smaller nail plates:
- Wipe the excess polish off one side of the brush neck against the bottle rim.
- Place the bead of polish in the center of the nail, roughly three millimeters away from the cuticle.
- Gently nudge the brush backward toward the cuticle, stopping just shy of the skin to create a clean gap.
- Draw the brush forward in a smooth, straight path toward the free edge.
- Finish by sweeping each side down in a single stroke.
Step 6: Cap the Micro Free Edge
Sealing the free edge is crucial on short nails because your fingertips make direct contact with surfaces all day long. To cap a very short edge without getting polish on your skin, lightly tilt your finger pad downward, gently pull the skin of your fingertip back with your thumb, and skim the edge of the brush horizontally across the tip.
Common Short Nail Art Mistakes (and How to Troubleshoot Them)
Even seasoned nail enthusiasts run into challenges when scaling down designs. Here is how to navigate the most frequent hurdles:
Flooding the Lateral Sidewalls
When polish runs into the lateral grooves of a short nail, it visually widens the finger and makes the manicure look messy.
- The Fix: If polish floods the groove, do not wait for it to dry. Dip your angled cleanup brush into pure acetone, blot the excess liquid onto a paper towel, and slice the bristles cleanly down the groove between the nail and the skin to re-establish a sharp, visible separation.
Piling on Thick, Bulbous Layers
Building up multiple thick layers of base, color, art, and top coat on a short nail creates a heavy, domed profile that looks bulky at the fingertip.
- The Fix: Work exclusively with thin layers. If your design requires multiple colors, use concentrated, highly pigmented polishes so that a single micro-layer provides full opacity. Allow each layer to dry completely before applying the next.
Smearing Fine Lines with Top Coat
Few things are more frustrating than completing a delicate set of lines or dots only to have your clear top coat drag streaks across the design.
- The Fix: Float your top coat. Load enough clear polish onto your brush so that the bristles never physically drag across the painted artwork. Let the bead of clear top coat roll down the nail ahead of the brush, gliding across the surface without disturbing the dry art underneath.
Neglecting Edge Shrinkage
Certain fast-drying top coats pull inward as they cure, causing the color to retract from the free edge and exposing a sliver of bare nail on day one.
- The Fix: Ensure your base coat, color, and top coat all cover the exact same perimeter. Always bring your color polish right to the edge before applying your sealing layer.
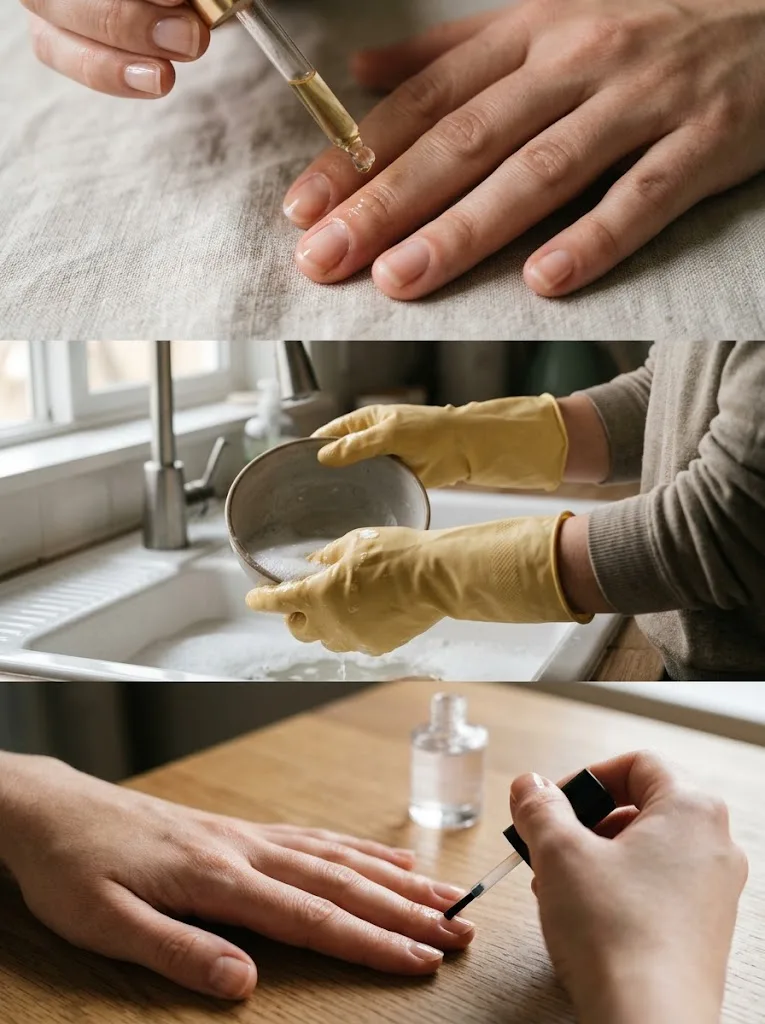
How to Maintain Short Manicures for Extended Wear
A minimalist manicure on short nails is naturally resilient, but everyday habits dictate whether it lasts three days or two weeks:
- Apply Jojoba-Based Cuticle Oil Twice Daily: Well-hydrated natural nails remain flexible. When an un-oiled nail gets bumped, the dry plate bends rigidly, causing the stiff layer of polish on top to snap and chip. Massaging oil into your cuticles and under the free edge keeps the nail bed resilient against daily impacts.
- Protect Hands During Wet Chores: Water is a major culprit behind early manicure lifting. When natural nails soak in water, they absorb moisture and expand. As they dry, they contract back to their original size. This constant expansion and contraction breaks the adhesive bond between your base coat and nail plate. Wear lined rubber gloves when washing dishes or handling household cleaning solutions.
- Touch Up the Top Coat Mid-Week: On short nails, daily typing, tapping screens, and handling objects causes micro-abrasions along the tip. Applying a fresh, ultra-thin layer of top coat after three or four days restores mirror shine and reseals the vulnerable edge.
Frequently Asked Questions
Do bold or dark colors make short nails look even shorter?
Not necessarily. While light, sheer neutrals naturally extend the visual line of the finger by blending with skin tones, deep shades like espresso, black, oxblood, and navy look exceptionally chic and tailored on short nails. The key is leaving a clean hairline gap between the polish and the sidewalls so the dark color frames the nail cleanly rather than crowding the surrounding skin.
Can I do nail art if my nails are bitten down past the fingertip?
Yes. If your nails are very short, avoid full French tips or heavy borders, which draw attention to the uneven edge. Instead, focus on negative-space designs, such as a single floating dot, a delicate vertical line down the center, or a sheer glazed wash with micro gold flakes. These styles highlight the center of the nail plate and look intentional, regardless of length.
Is gel polish or regular nail lacquer better for short nail art?
Both work well, but gel polish offers a major advantage for intricate line work: it does not air-dry. With gel, you can take all the time you need to perfect a delicate micro French tip or botanical line. If your hand shakes or the line wavers, you can wipe it away with an alcohol pad and start fresh without ruining the cured base underneath. Regular lacquer, however, is gentler for those who like to switch up their designs frequently without soaking off product.
How can I make wide nail beds look more slender?
Vertical line designs, centered pinstripes, and negative-space accents that leave the outer thirds of the nail bare are excellent options for visually narrowing wide nail beds. Another classic manicurist trick is leaving a tiny half-millimeter gap unpainted on both outer sidewalls when applying opaque color, which creates an instantly slimmer silhouette.
What is the easiest short nail design for a total beginner?
The single micro-dot manicure placed near the cuticle is the most beginner-friendly design. It requires zero freehand brush control, takes only a minute to apply with a bobby pin or dotting tool, and immediately looks balanced, intentional, and editorial.
Why does polish seem to chip off the tips of short nails faster?
Short nails do not have the extended overhang that takes the brunt of impacts on long extensions, meaning your fingertip and the nail edge constantly collide with keyboards, counters, and phone screens. To combat this friction, ensure your free edge is filed smooth without ragged edges, cap the edge lightly with top coat, and keep the nails moisturized with cuticle oil to absorb shock.
Curating nail art on short nails is all about embracing balance, scale, and clean execution. When you let negative space do the heavy lifting and treat each delicate line with intention, you prove that keeping your nails practical, natural, and low-maintenance never means settling for boring manicures.
Ready to explore more ways to elevate your natural nails? Browse our comprehensive guides to finding the perfect neutral shades for your undertone, master at-home cuticle care routines, and discover fresh seasonal nail inspiration designed specifically for active-length nails.
Idea for Later!
Looking for chic short nail art designs? Discover 10 stunning minimalist manicure ideas that prove less really is more. From micro French tips to modern negative space, learn how to flatter small nails with clean, elegant style. Click through to read the full guide! #ShortNails #MinimalistNails #NailArtInspo #CleanGirlAesthetic #ShortManicure

