
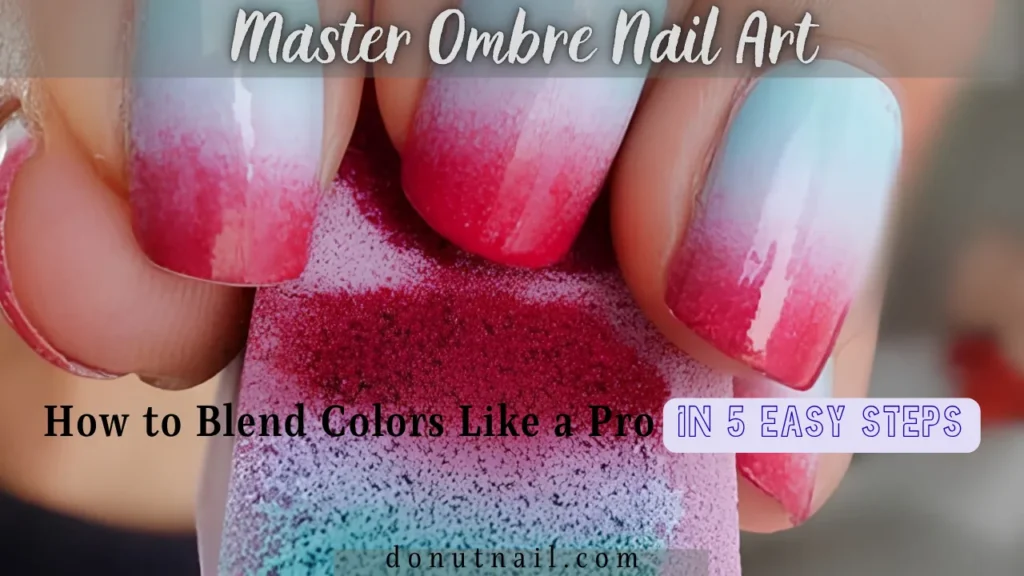
Master Ombre Nail Art: How to Blend Colors Like a Pro in 5 Easy Steps with this beginner-friendly guide. Learn the secrets to flawless gradient nails at home!
Have you ever tried to create ombre nails, only to end up with a streaky, patchy mess that looks nothing like those stunning Pinterest photos? I’ve been there too, and I know exactly how frustrating it can be. You see those gorgeous gradient nails online and think, “How do they do that?”
Well, the good news is that creating flawless ombre nails isn’t as complicated as it looks! With the right technique and a few insider secrets, you can absolutely achieve that professional-looking gradient effect right at home. This guide will teach you How to Blend Colors Like a Pro in 5 Easy Steps, breaking down the process into simple, manageable stages. From gathering your tools to mastering the perfect blend, I’ll walk you through everything you need to know. Ready to transform your nail game? Let’s dive in and create some stunning ombre magic together!
Step 1: Gather Your Essential Ombre Tools
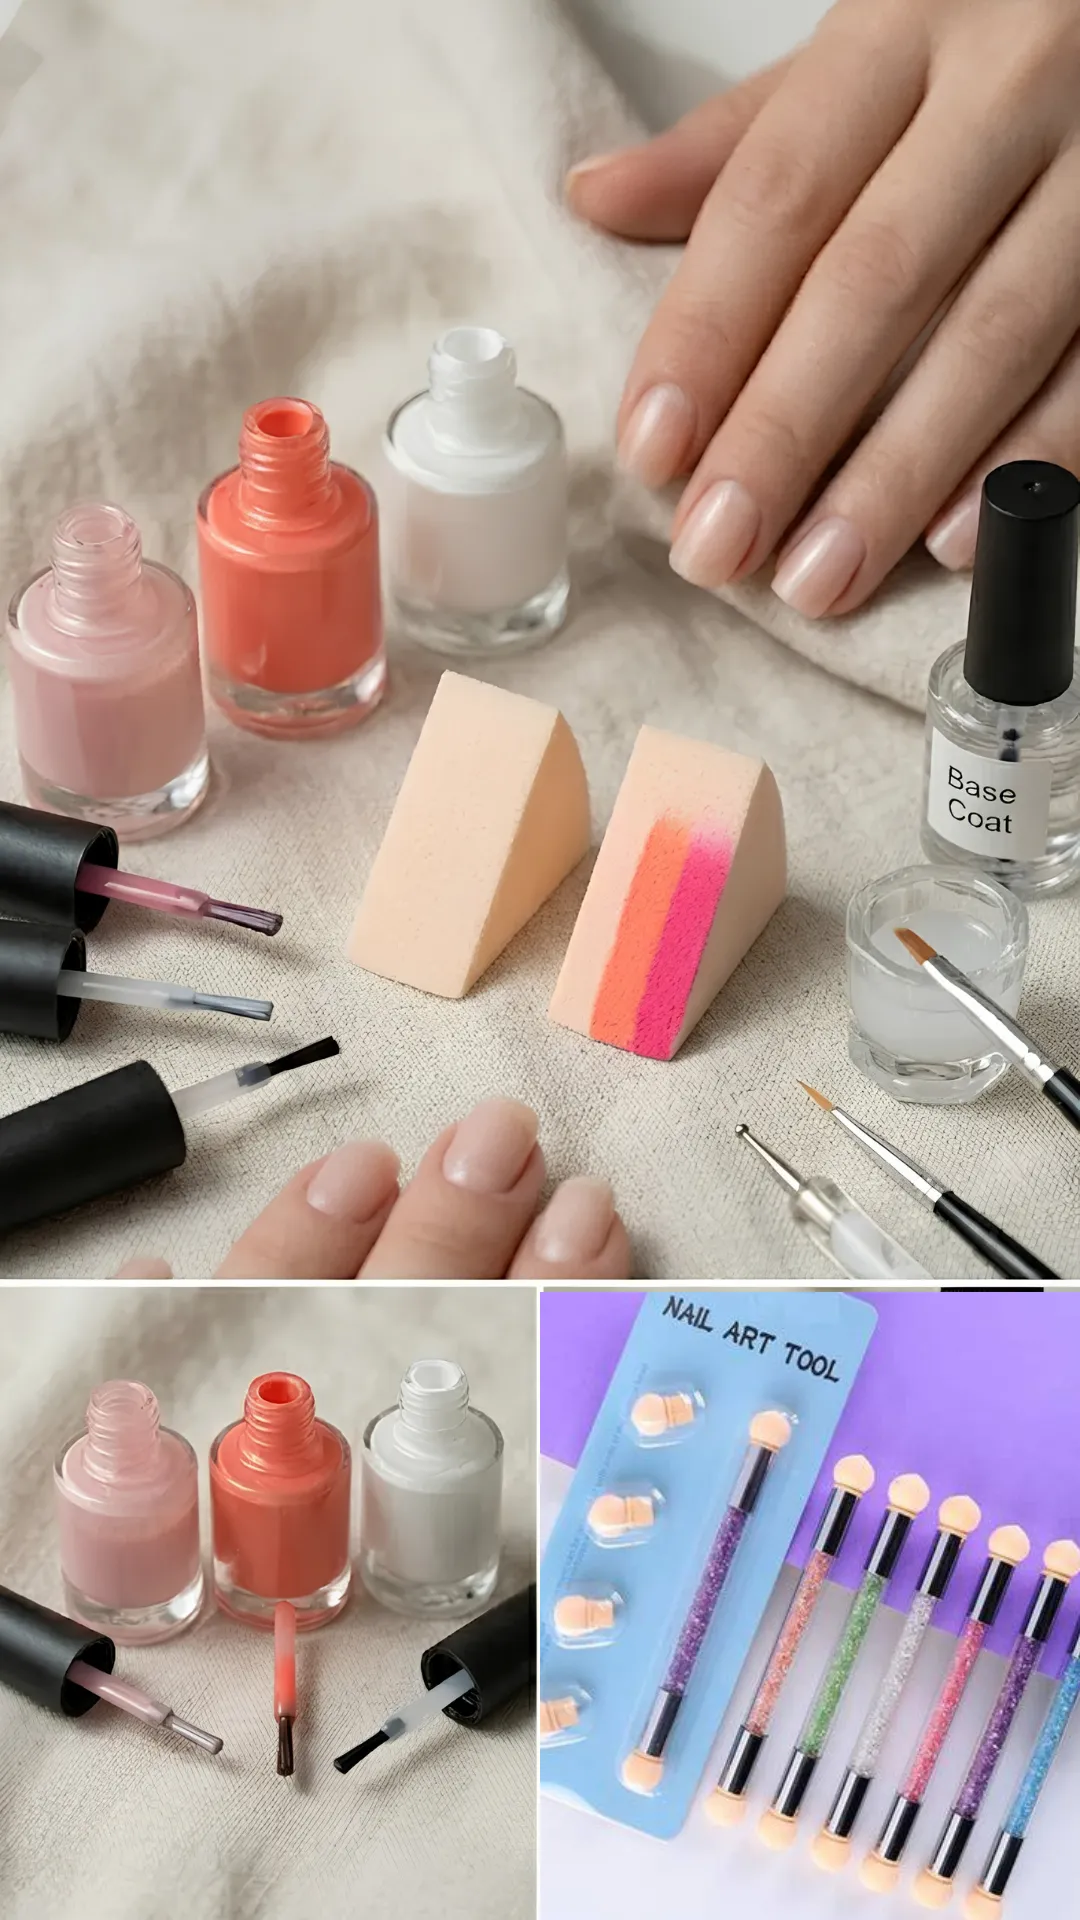
Before you start blending, you need the right tools. Think of this as preparing your artist’s palette before creating a masterpiece. Having the right supplies makes all the difference between a flawless gradient and a frustrating mess.
Here’s what you’ll need:
- Two or three nail polish colors (choose shades that blend well together)
- A makeup sponge (the wedge-shaped ones work best for ombre)
- A base coat and a quick-dry top coat
- Nail polish remover and cotton buds for clean-up
- Liquid latex or tape to protect your skin
- Optional: a dotting tool or small brush for adjustments
Pro tip: Choose polishes with a similar consistency for the smoothest blend. Creamy polishes work better than sheer or glittery ones for beginners. The key to mastering Master Ombre Nail Art: How to Blend Colors Like a Pro in 5 Easy Steps is starting with the right foundation, and that means having the perfect tools ready before you begin.
A little wisdom to hold onto: don’t stress if you don’t have all the fancy tools. A basic makeup sponge and your favorite polishes are enough to create stunning ombre nails. You can build your collection over time!
Step 2: Choose Your Perfect Color Combination
This is where the magic begins! Choosing the right color combination is crucial for a stunning ombre effect. The best ombre nails feature colors that flow seamlessly into each other, creating that beautiful gradient transition.
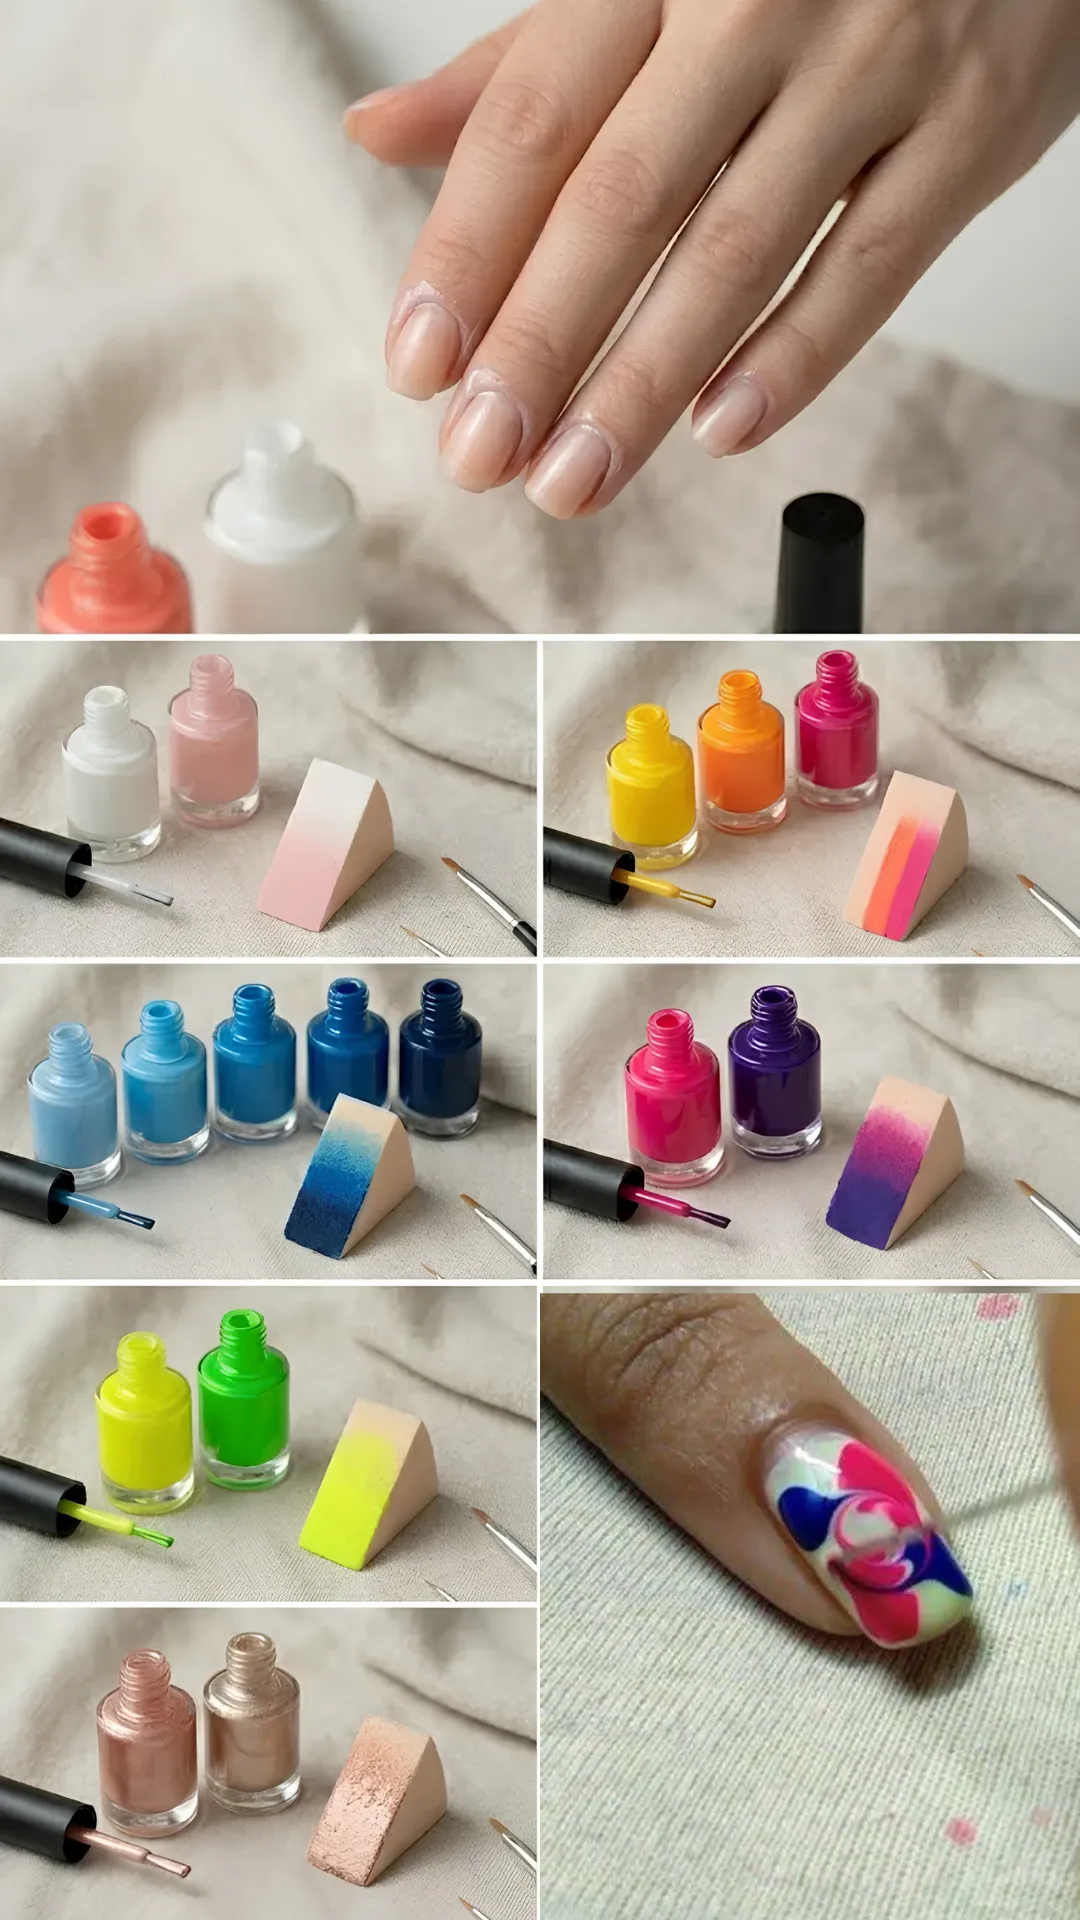
Here are some foolproof color combinations to try:
- Classic elegance: White to soft pink or nude
- Sunset vibes: Yellow to orange to pink
- Ocean dreams: Light blue to deep navy
- Bold and beautiful: Hot pink to purple
- Neon energy: Bright yellow to electric green
- Neutral chic: Beige to taupe to warm brown
- Romantic glow: Rose gold to champagne
Pro tip: For beginners, start with two colors that are similar in tone. For example, light pink to dark pink is much easier to blend than yellow to purple. As you gain confidence, experiment with more dramatic color transitions.
A golden rule to remember: always test your color combination on a piece of paper or a nail tip before applying it to your actual nails. This helps you visualize the final result and make any adjustments before you commit. This little step is a game-changer when you’re learning How to Blend Colors Like a Pro in 5 Easy Steps.
Step 3: Master the Sponge Technique
Now comes the most important part – the actual blending! This is where many people go wrong, but with my step-by-step guidance, you’ll nail it every single time. The sponge technique is the secret behind those flawless, professional-looking ombre nails.
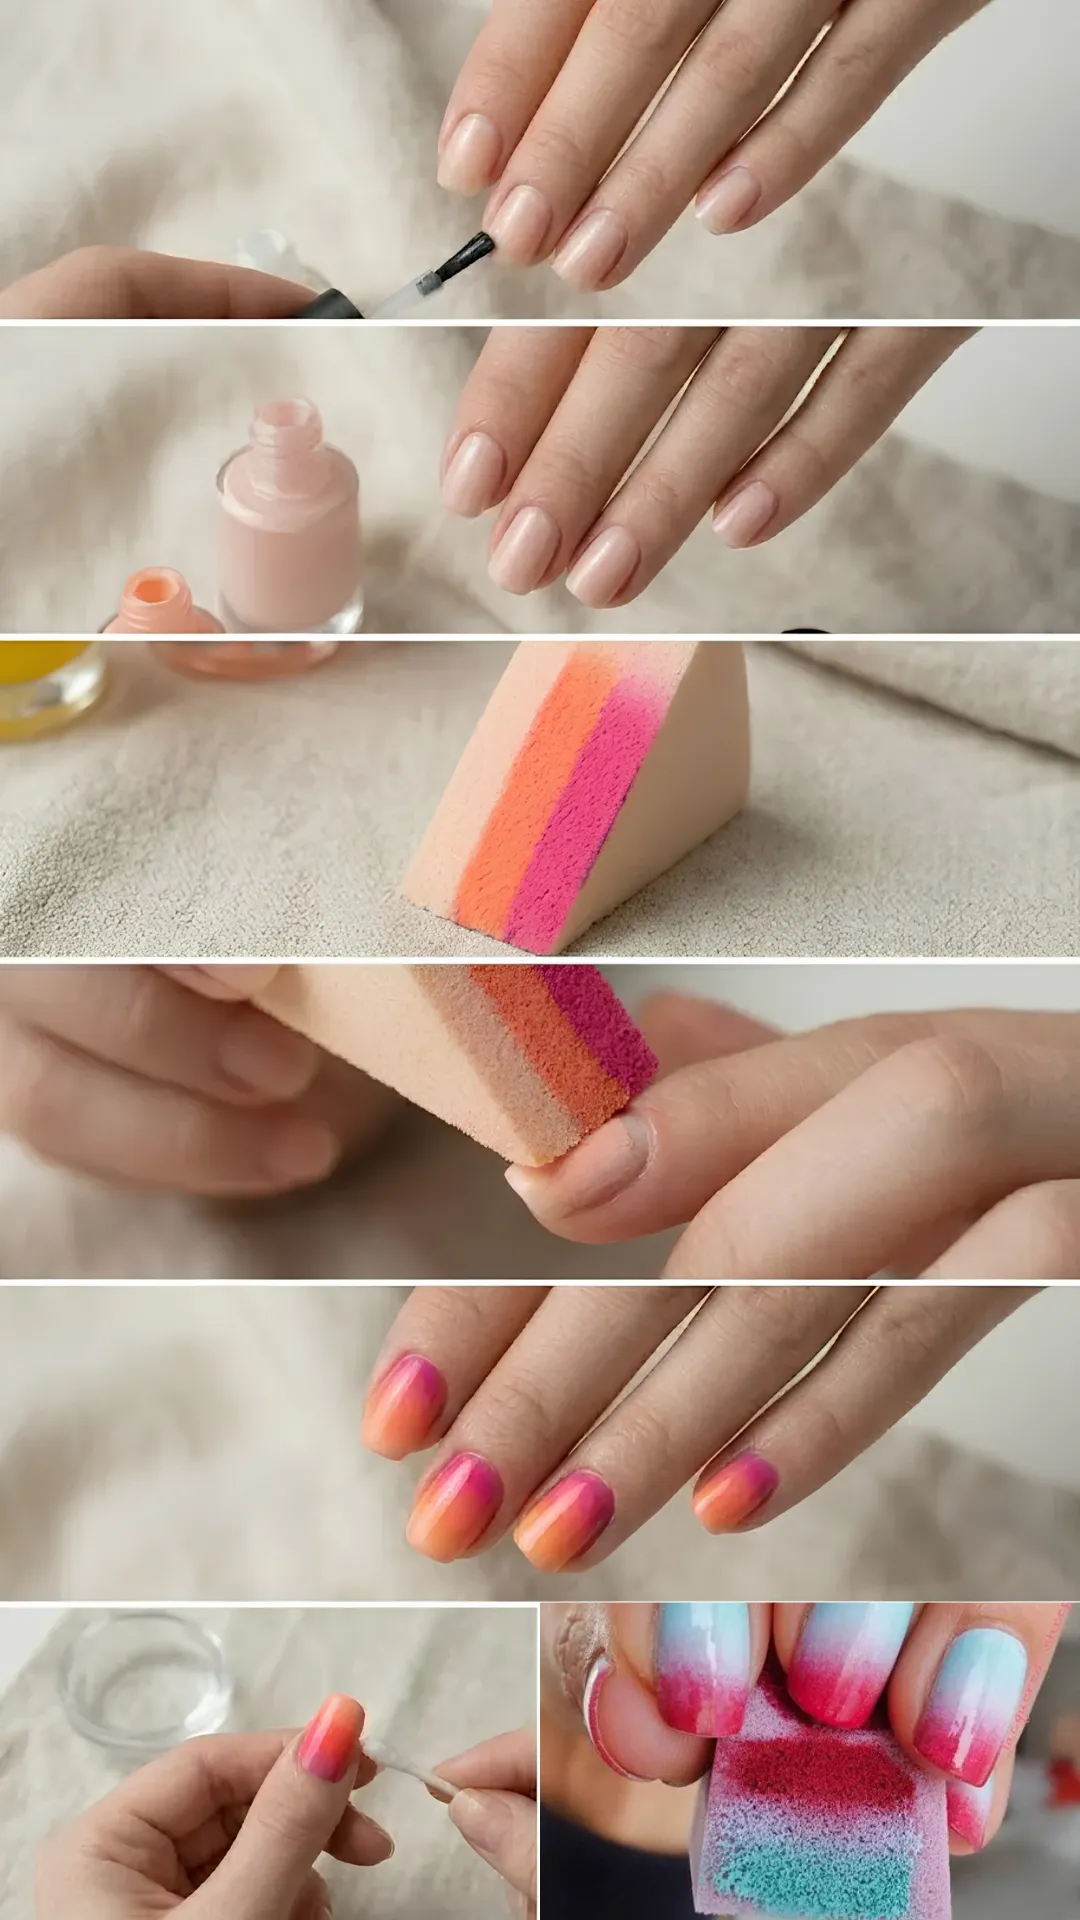
Follow these steps carefully:
- Start with a base coat on all your nails and let it dry completely.
- Apply your lightest color as a base on all nails. This helps the ombre blend more smoothly.
- Paint stripes of your chosen colors directly onto the makeup sponge. Make sure the colors overlap slightly in the middle for a seamless blend.
- Dab the sponge onto your nail gently. Don’t swipe or rub – just dab!
- Repeat the dabbing motion until you achieve your desired opacity.
- Clean up any polish on your skin with a cotton bud dipped in remover.
Pro tip: Work on one nail at a time, and don’t rush! Dab the sponge multiple times to build up the color gradually. This gives you more control over the final look and prevents that chunky, uneven appearance.
A nugget of wisdom to treasure: after each nail, reapply fresh polish stripes to your sponge. The polish absorbs into the sponge quickly, so fresh application ensures vibrant, consistent color for every nail.
Step 4: Perfect Your Blending Technique
Now that you’ve mastered the basic sponge technique, let’s talk about refining your blend for that truly professional finish. This step is where good ombre nails become great ombre nails. It’s all about the details and knowing how to fix common issues.
Common blending problems and solutions:
- Streaky lines: Your polish might be too thick. Try adding a drop of nail polish thinner or use thinner coats.
- Patchy coverage: You’re not dabbing enough. Build up the color with 3 to 4 layers of dabbing.
- Colors not blending: Your colors might be too contrasting. Try adding a transition color in the middle.
- Sponge texture on nails: Your top coat will smooth this out, so don’t worry!
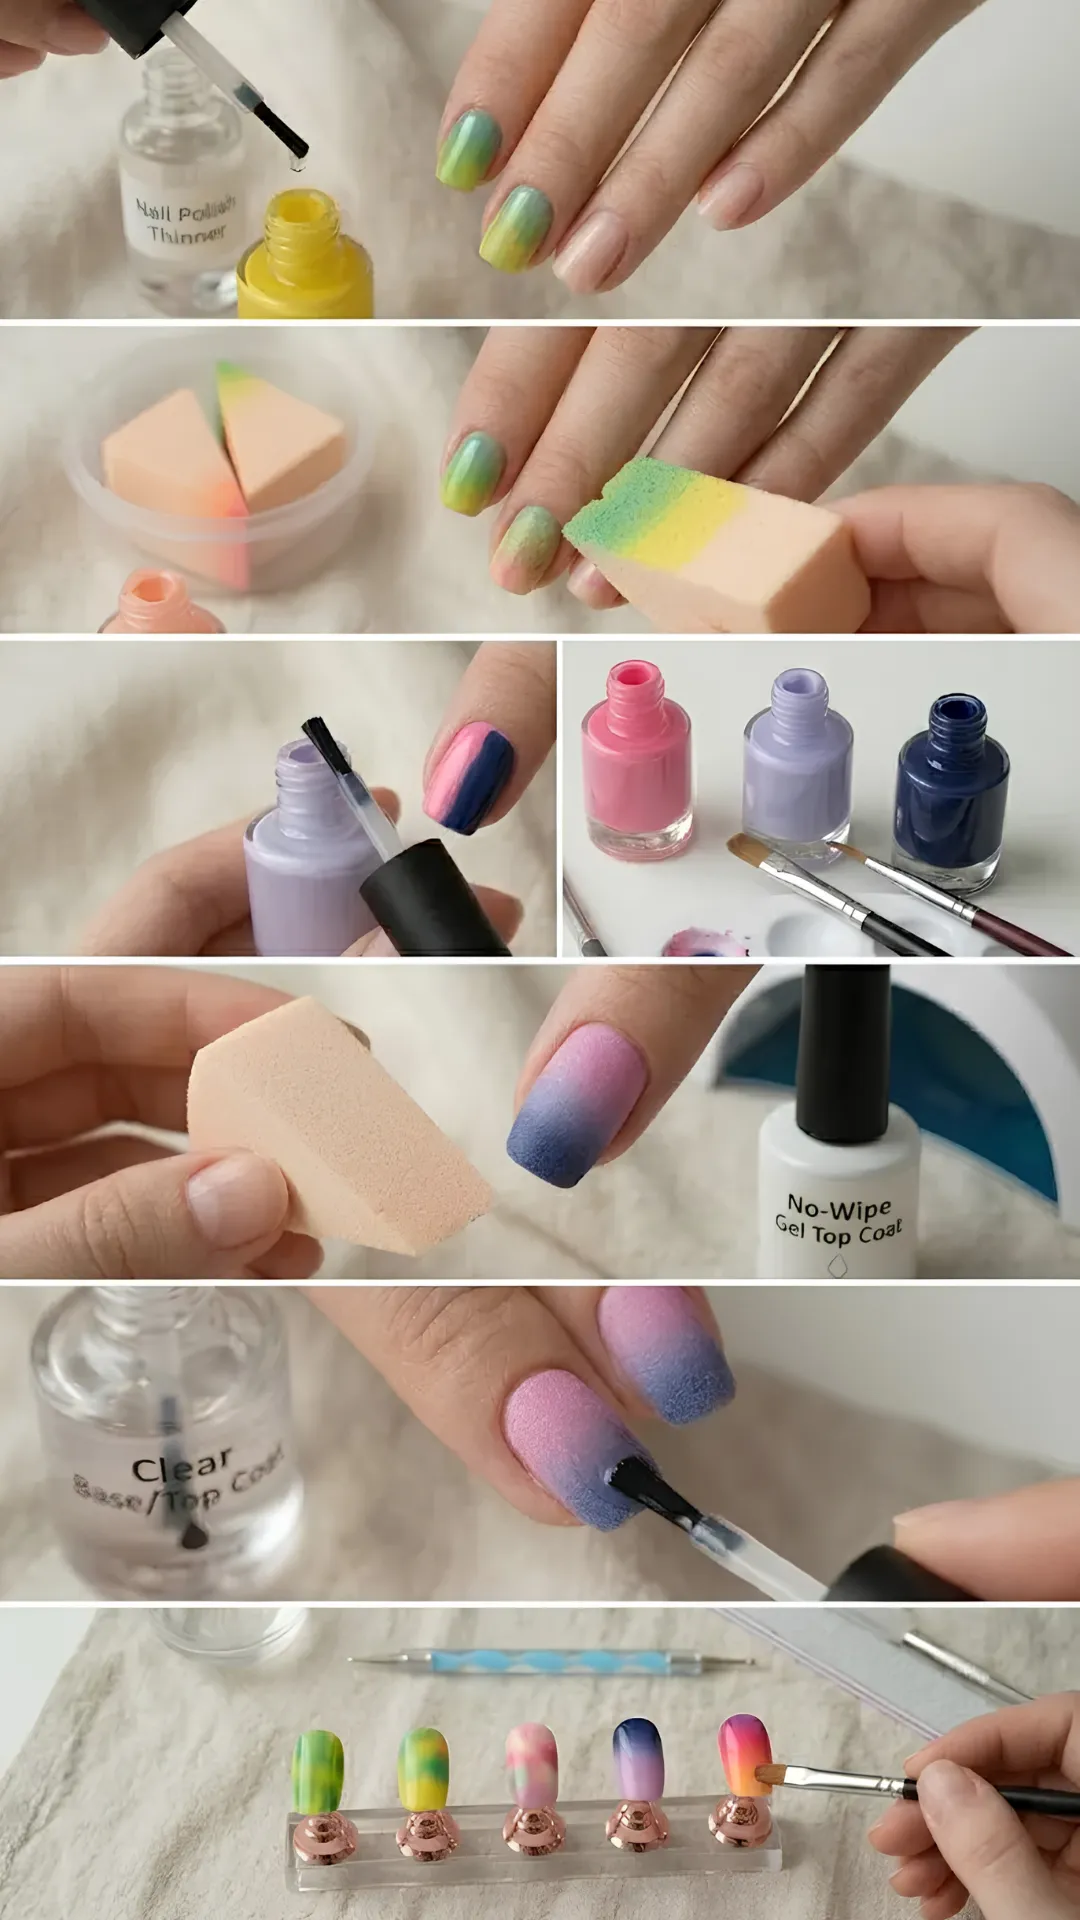
Pro tip: For an even smoother blend, apply a thin layer of clear polish or top coat over your ombre while the polish is still slightly tacky. This helps the colors merge together beautifully. This advanced technique is what separates amateurs from pros and is a key part of Master Ombre Nail Art: How to Blend Colors Like a Pro in 5 Easy Steps.
A piece of advice to cherish: practice on a nail tip or a piece of paper before doing your actual nails. This builds confidence and helps you perfect your technique without the pressure. Remember, every pro was once a beginner!
Step 5: Seal, Shine, and Show Off
You’ve created your beautiful ombre masterpiece – now it’s time to seal the deal! The finishing touches are crucial for making your ombre nails last and look absolutely stunning. Don’t rush through this step, or all your hard work might be ruined.
Complete your ombre nails with these final steps:
- Apply a generous layer of quick-dry top coat. This smooths out any sponge texture and adds a gorgeous shine.
- Let your nails dry completely before doing anything else. Patience is key!
- Apply a second layer of top coat the next day for extra protection and longevity.
- Clean up any remaining polish on your cuticles with a small brush dipped in remover.
- Admire your gorgeous ombre nails!
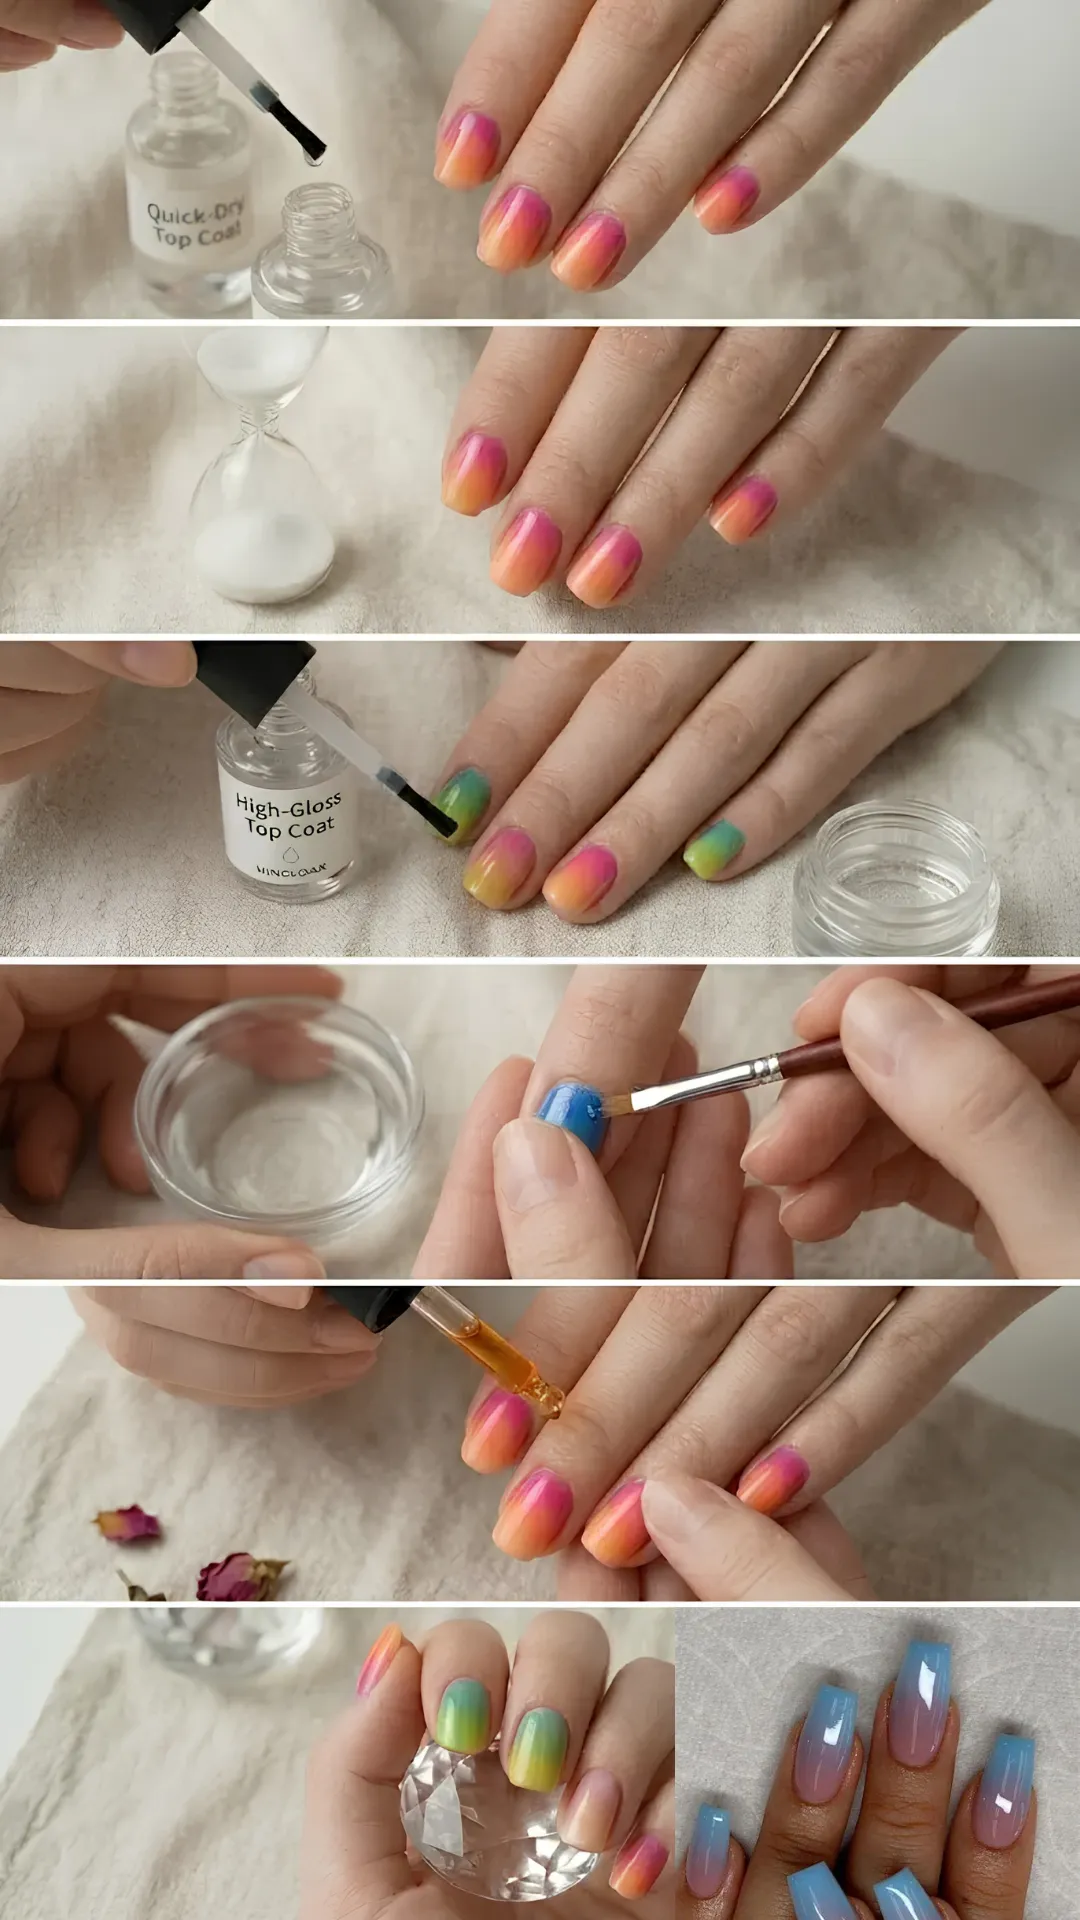
Pro tip: For extra durability, cap the free edge of your nails with each coat of polish and top coat. This seals the edges and prevents chipping, keeping your ombre nails beautiful for days.
A little wisdom to hold onto: after your top coat, apply a cuticle oil to nourish your skin and give your manicure that polished, professional finish. It’s the little details that make all the difference!
Bonus Tips for Ombre Perfection
Now that you know the 5 steps, let me share some bonus tips that will take your ombre nails to the next level. These are the secrets that professional nail artists use to create those jaw-dropping gradients.
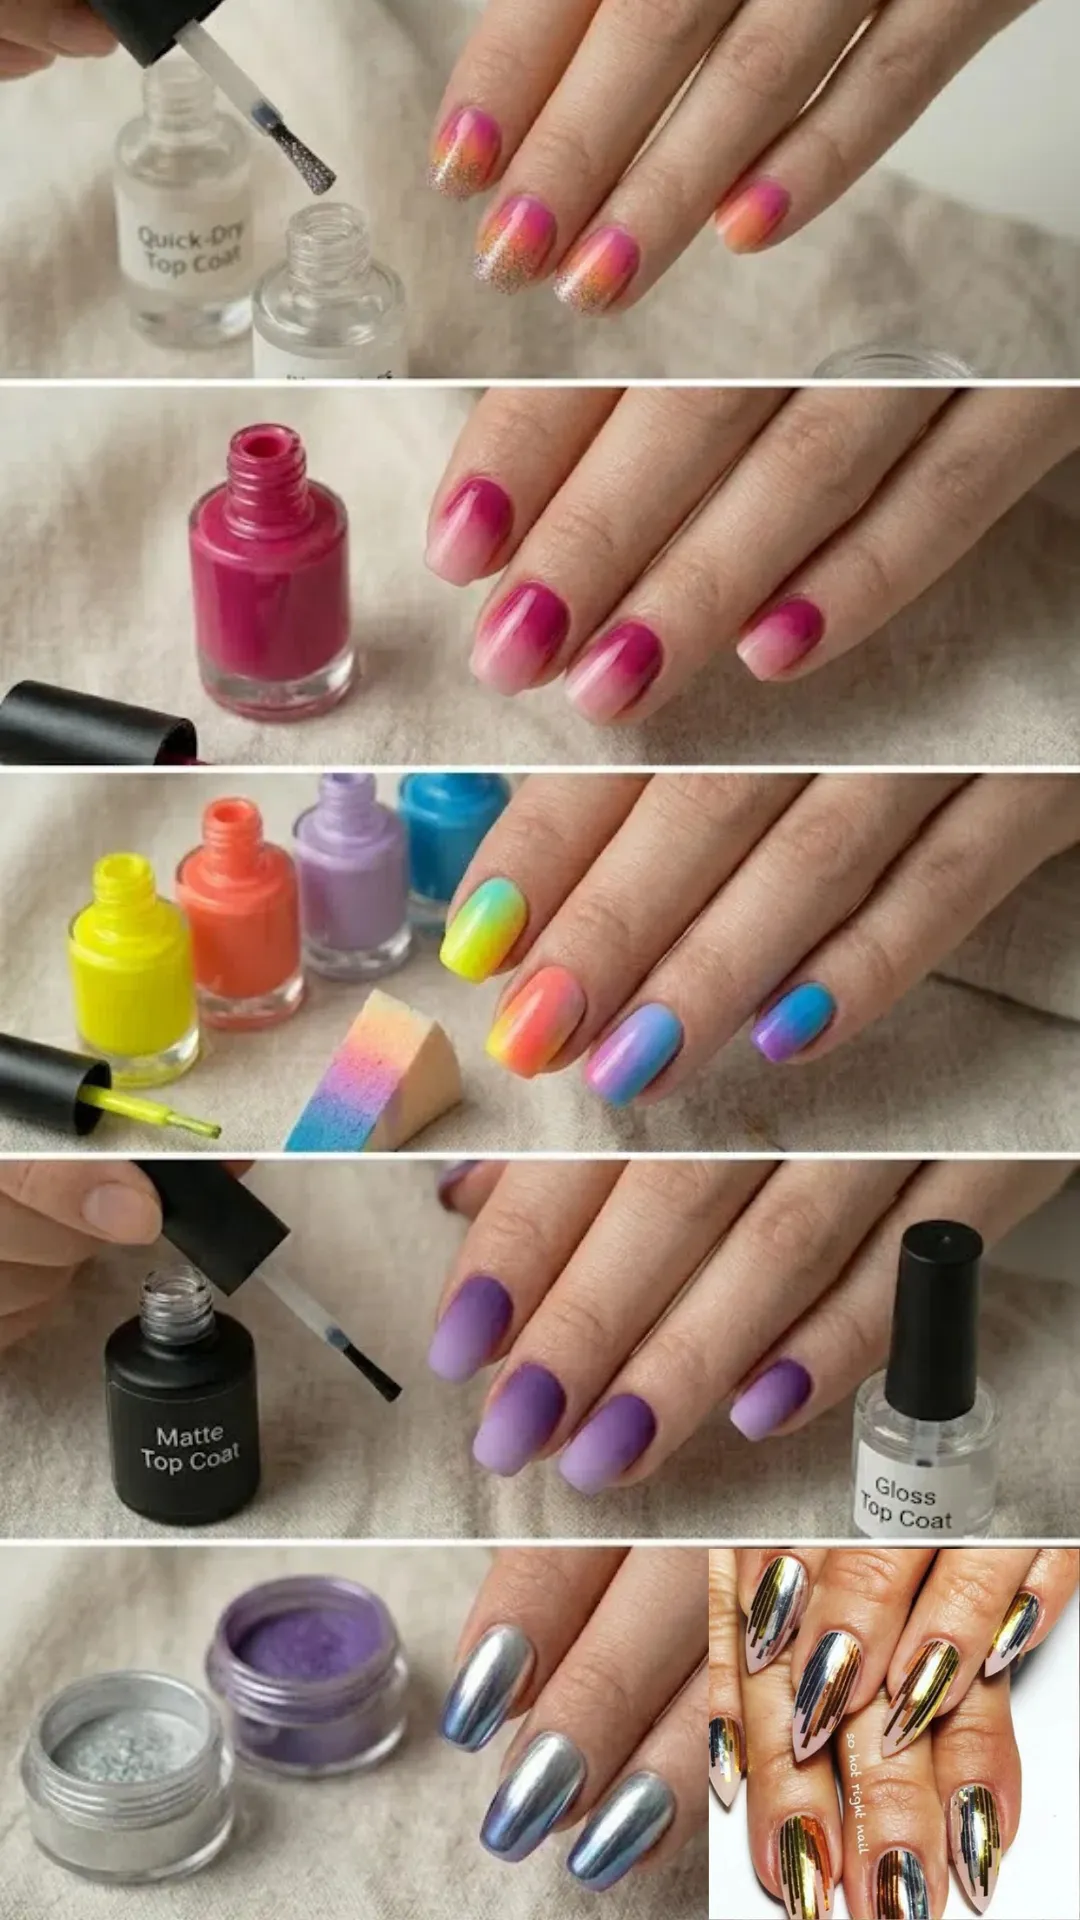
Creative ombre variations to try:
- Glitter ombre: Add a layer of glitter polish to the tips of your ombre nails for extra sparkle. It’s perfect for parties and special occasions!
- Reverse ombre: Start with the dark color at the base and blend to light at the tips. It’s unexpected and totally chic.
- Multicolor ombre: Use three or four colors for a more dramatic, rainbow effect. This is stunning for summer!
- Matte ombre: Finish with a matte top coat instead of gloss for a modern, edgy look.
- Metallic ombre: Use metallic or chrome polishes for a futuristic, high-shine gradient.
How to make your ombre nails last longer:
- Always use a base coat to protect your natural nails.
- Apply thin, even layers of polish.
- Cap the free edge of your nails.
- Reapply top coat every 2 to 3 days.
- Wear gloves when doing household chores.
A golden rule to remember: don’t be afraid to experiment! Ombre nail art is incredibly versatile, and the more you practice, the better you’ll become. Try different color combinations, finishes, and techniques to find your signature style.
Troubleshooting Common Ombre Problems
Even with the best technique, things can sometimes go wrong. Here’s how to fix the most common ombre nail art problems so you can save your manicure and still achieve gorgeous results.
Problem: My ombre looks streaky and uneven.
Solution: You might be pressing too hard with the sponge. Use a gentle dabbing motion and build up the color gradually with multiple layers. Also, make sure your polish isn’t too thick.
Problem: The colors aren’t blending together.
Solution: Try overlapping the colors more on the sponge. Also, adding a transition color in the middle of your color spectrum can help create a smoother blend.
Problem: The sponge texture is visible on my nails.
Solution: This is actually normal! A good quality top coat will smooth out any texture. Apply two layers of top coat for the smoothest finish.
Problem: My ombre nails chipped within a day.
Solution: Make sure you’re capping the free edge of your nails with every coat. Also, applying a second layer of top coat the day after your manicure adds extra protection.
A tip to treasure: if you make a mistake, don’t panic! Nail polish remover and a small brush can clean up most errors. Practice makes perfect, and every nail artist has had their share of ombre fails.
Your Ombre Journey Starts Now
I hope this guide has inspired you to try ombre nail art and shown you exactly How to Blend Colors Like a Pro in 5 Easy Steps. Remember, the key to beautiful ombre nails is practice, patience, and having fun with the process. Every attempt will teach you something new and bring you closer to mastering this gorgeous technique.
Whether you’re creating soft, romantic gradients or bold, vibrant fades, ombre nails are a beautiful way to express your creativity and style. So grab your polishes, pick your favorite color combination, and start blending!
Ready to Create Your Own Ombre Masterpiece?
I would absolutely love to see your ombre nail creations! If you try any of the techniques I’ve shared, please share them with me. Drop a comment below and tell me which color combination you chose. Are you team sunset ombre, team ocean blue, or team pink perfection? Let’s chat and celebrate your ombre journey together!
And don’t forget to save this guide to your Pinterest board so you can come back anytime you need ombre inspiration. Your perfect ombre nails are just 5 steps away – go create something beautiful, gorgeous!
Learn How to Blend Colors Like a Pro in 5 Easy Steps with this beginner-friendly ombre nail art guide! From tools and color combos to sponge techniques and pro tips, create flawless gradient nails at home. Save this pin for ombre inspiration! 💅 #OmbreNails #NailArtTutorial #GradientNails
Table of Contents
You might also Like:5 Must-Know Floral Nail Art Techniques That Work for Any Season!

