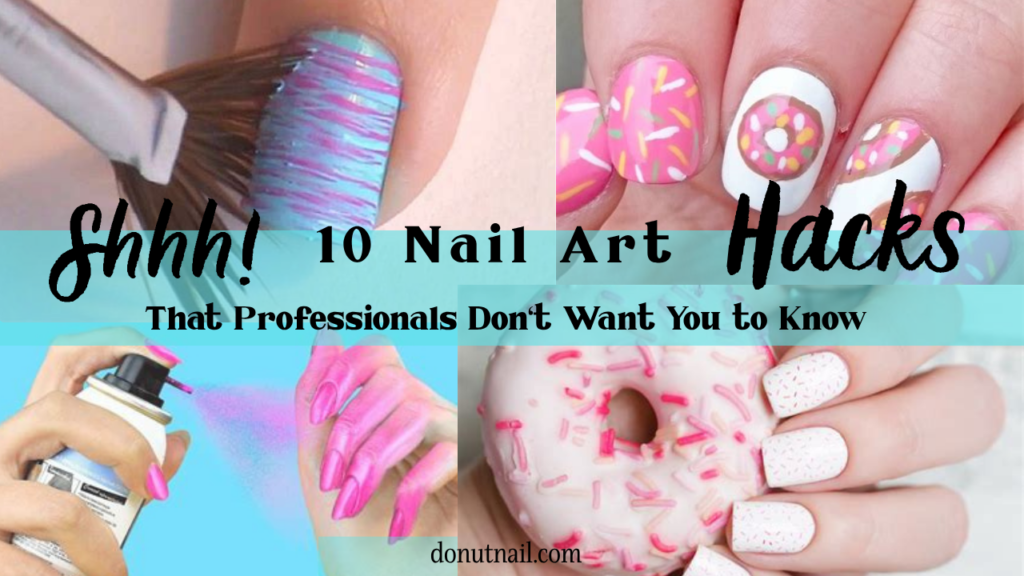
Discover 10 nail art hacks that professionals don’t want you to know! Easy, DIY tricks for salon-quality nails at home. Save this pin & read more.
We’ve all been there. You stare at a gorgeous nail art design on Pinterest, but when you try it yourself? Smudges, streaks, and total frustration. What if I told you the pros have little secrets that make perfect nails actually easy? Today I’m sharing 10 nail art hacks that professionals don’t want you to know – and trust me, #7 will change your life. Grab your polish, and let’s get chatting like besties over coffee.
1. Use a Hair Tie for Perfectly Straight Stripes
Want crisp, clean lines without spending money on striping tape? Grab a regular hair elastic. Stretch it gently around your nail, leaving gaps where you want the stripe. Paint over it, then carefully remove the elastic. Voilà – perfect parallel lines.
That professionals don’t want you to know this trick works even better than some expensive vinyl stencils.
Pro tip: “A 50-cent hair tie beats a $15 striping brush every time.”
2. Water Marble Without the Mess
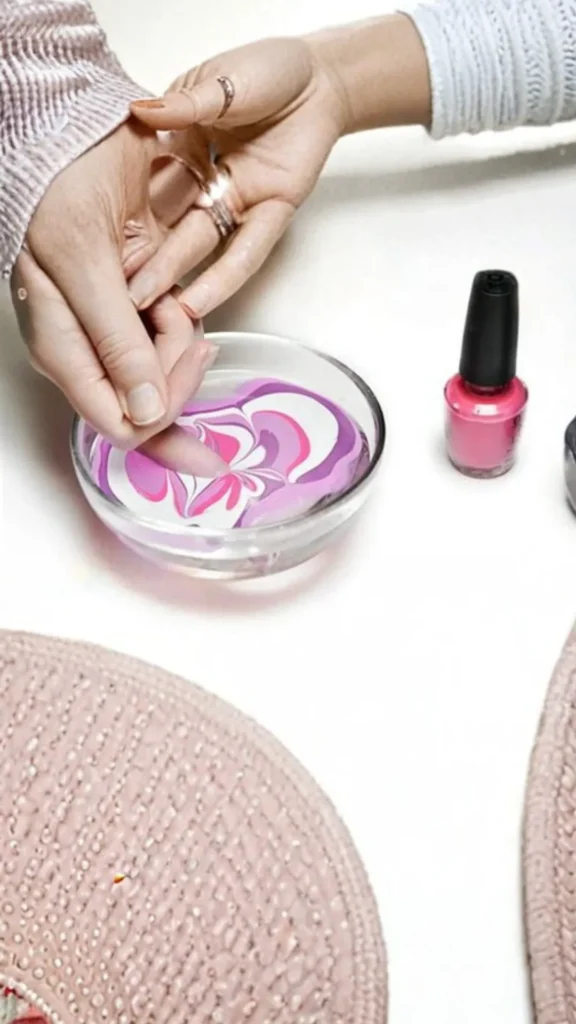
Water marbling looks like magic, but it usually ends with polish all over your fingers. Here’s the fix: use room-temperature filtered water, and add a drop of dish soap to help polish spread. Then tape around your nail with scotch tape before dipping. Peel off the tape, and zero cleanup.
That professionals don’t want you to know they use this same soap trick in salons – they just don’t advertise it.
Pro tip: “Soapy water + tape = marble nails without the horror show.”
3. Clean Up Mistakes with an Eyeliner Brush
You don’t need a fancy clean-up brush. A cheap angled eyeliner brush dipped in 100% acetone works better. It’s thin enough to trace your cuticles perfectly.
That professionals don’t want you to know many nail techs buy $2 makeup brushes instead of salon tools.
Pro quote: “Your makeup bag is hiding your best nail art tool.”
4. Liquid Latex from the Craft Store
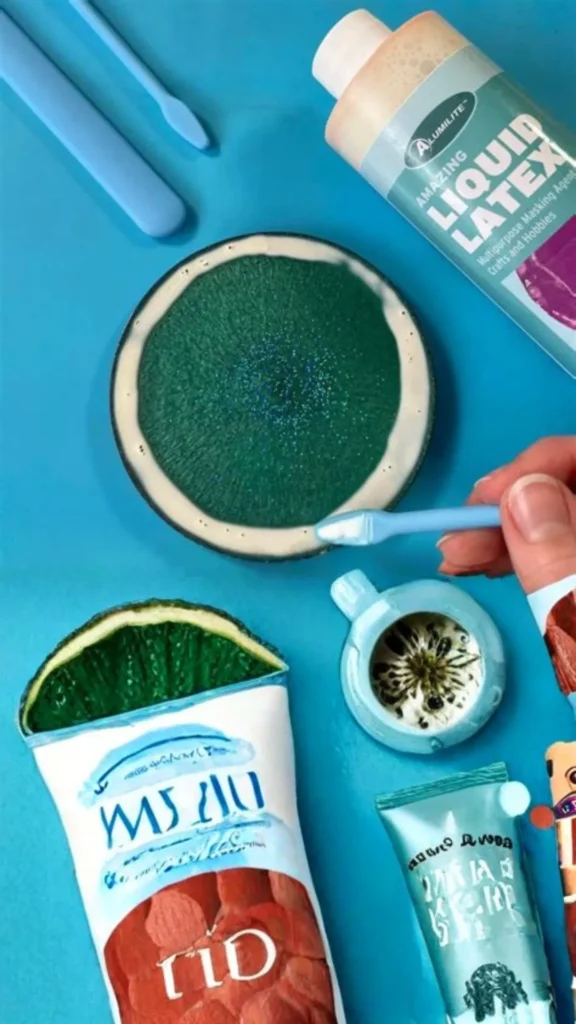
Liquid latex (sold for special effects makeup) is the same stuff in expensive peel-off cuticle protectors. Paint it around your nails before stamping or sponging. Peel it off when you’re done – perfection.
That professionals don’t want you to know the exact same bottle costs 70% less when labeled “special effects” instead of “nail art.”
Pro tip: “Craft store latex saves your sanity and your cuticles.”
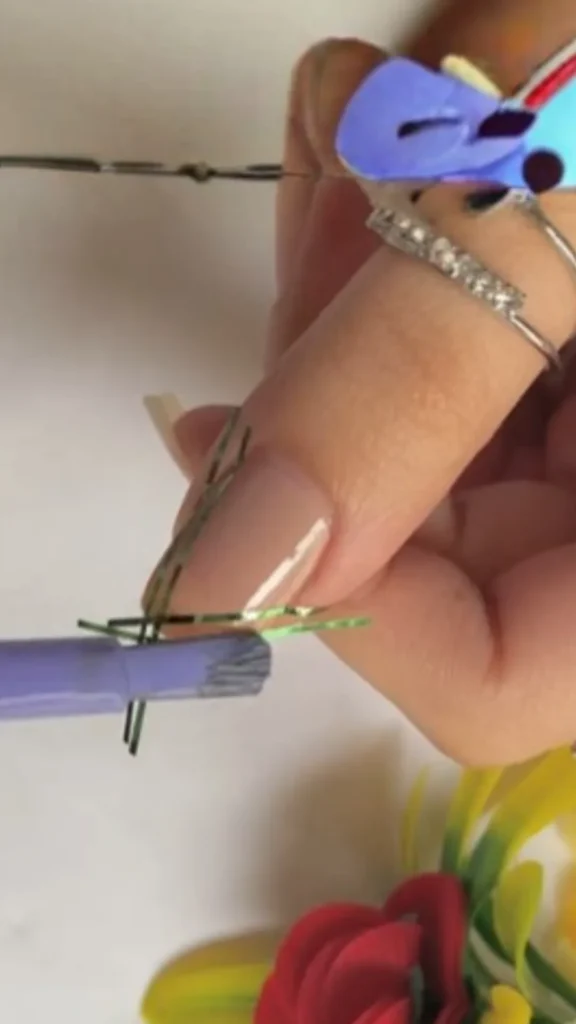
5. Bobby Pins Are Better Than Dotting Tools
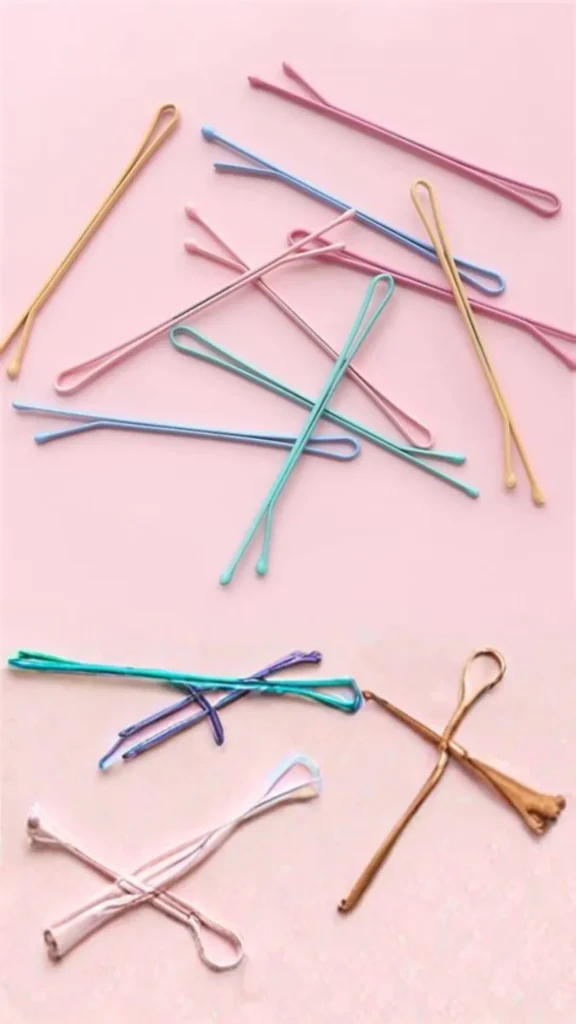
Lost your dotting tool? Open a bobby pin. The small round end creates perfect tiny dots for flowers or polka dots. The larger end (the smooth curve) makes medium dots. Two tools for free.
That professionals don’t want you to know they often reach for bobby pins when their dotting set is missing a size.
Pro tip: “Every girl has bobby pins. Every girl can make dalmatian nails.”
6. Makeup Sponge Ombré – But Wet It First
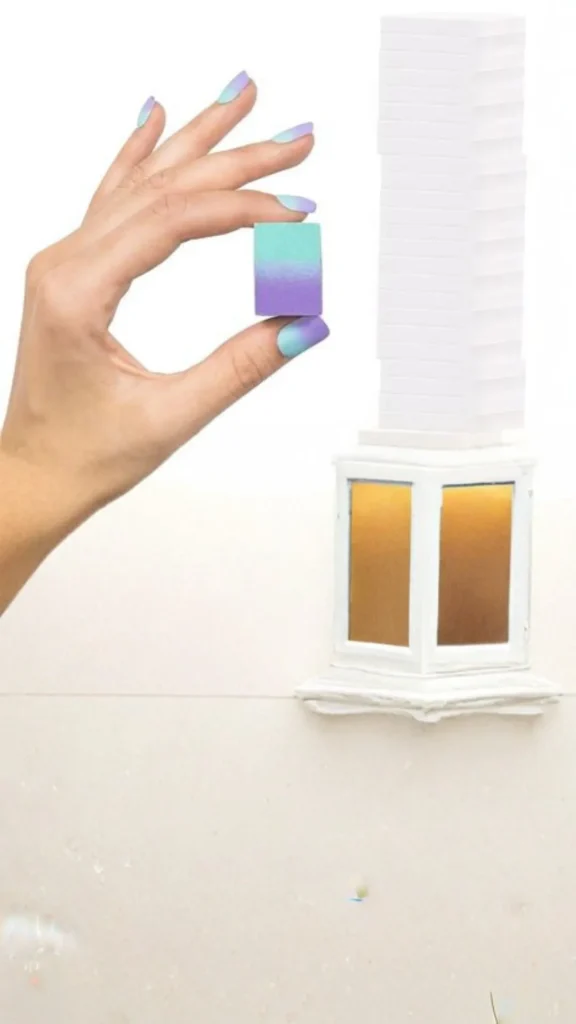
Everyone says use a makeup sponge for gradients. But dry sponges soak up too much polish. Run your sponge under water, squeeze it almost dry, then dab on polish. The dampness pushes polish onto your nail instead of absorbing it.
That professionals don’t want you to know this one damp-sponge trick is the difference between a streaky mess and a smooth fade.
Pro quote: “Wet sponge = wet dream for gradient lovers.”
7. Ice Water to Lock in Your Top Coat
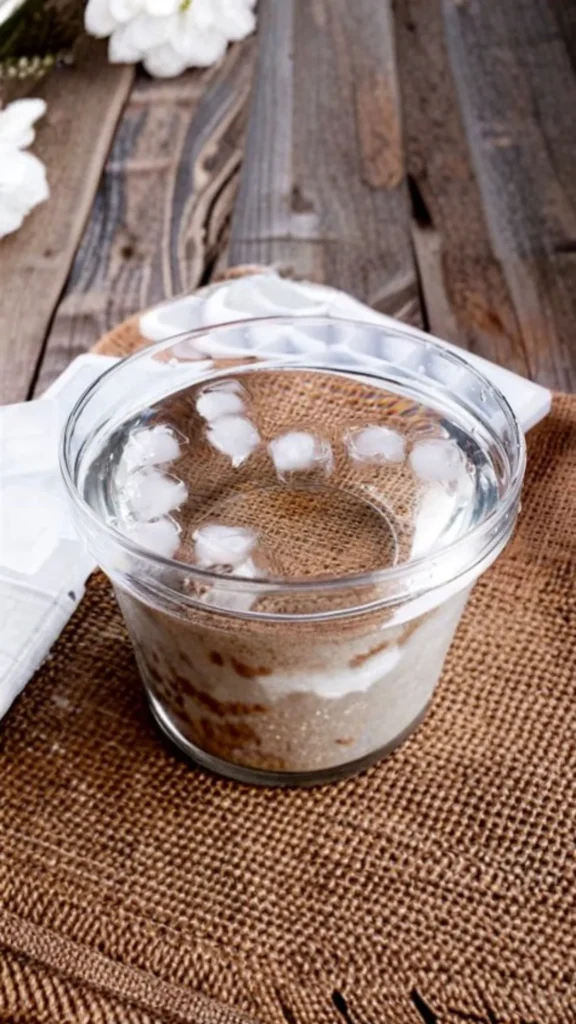
Wait 60 seconds after your final top coat, then dip your nails in a bowl of ice water for 3 minutes. The cold shock hardens polish faster than any quick-dry spray. No dents, no smudges.
That professionals don’t want you to know some rush salons use this trick between customers – they just call it “cold curing.”
Pro tip: “Ice water is cheaper than a $15 drying drops. And it works better.”
8. Fix a Smudge with a Matte Top Coat
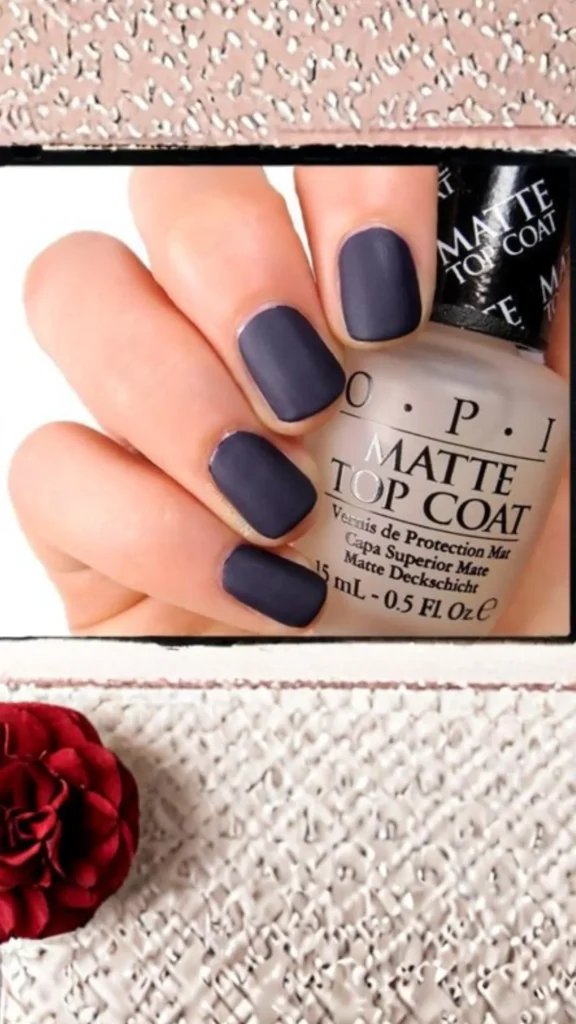
You just smudged a nail you spent 20 minutes on. Don’t restart. Apply a matte top coat over the whole nail – it hides uneven surfaces and tiny smudges. Then add a glossy top coat on top if you want shine back.
That professionals don’t want you to know matte top coat is their secret eraser for almost-dry accidents.
Pro tip: “Matte coat = instant forgiveness for clumsy fingers.”
9. Scotch Tape Geometrics – With One Weird Trick
Tape is great for French tips, but it often lifts wet polish. Stick the tape to your palm first, then peel it off. This removes excess stickiness so it won’t pull up your base color.
That professionals don’t want you to know they de-tape the same way using the back of their hand.
Pro quote: “Sticky tape ruins nails. Palm-tapped tape saves them.”
10. Turn Eyeshadow into Custom Nail Polish

Have a broken eyeshadow or a shade you love? Scrape a little powder into a clear polish bottle. Shake well. Boom – your own custom color. Works with matte or shimmer shadows.
That professionals don’t want you to know indie nail brands literally use the same pigment suppliers as makeup companies.
Pro tip: “That sad broken eyeshadow? It just became your new signature nail color.”
Loved these secrets? There’s so much more where these came from. Visit my website for weekly nail art tutorials, free printable hack sheets, and a community of girls swapping their own pro tricks. Click over, leave a comment with your favorite hack, and let’s keep chatting – your next perfect manicure is just a click away.
Stop struggling with smudges and streaks! These 10 nail art hacks that professionals don’t want you to know will save you time, money, and frustration. From bobby pin dotting to ice water drying – save this pin for your next DIY mani! #NailArtHacks #DIYNails #PinterestNails
You might also like 10 Elegant Bridal Nail Art Ideas for the Most Important Day of Your Life
