
Learn 5 must-know floral nail art techniques that work for any season! From simple dots to full blooms, get wild & funky ideas for gorgeous nails.
Do you ever scroll through Pinterest and see those stunning floral nails and think “I could never do that”? I used to feel the same way. But here’s the secret: Floral Nail Art Techniques are way easier than they look. You don’t need to be a painter or spend hours in a salon. With a few simple tricks, you can turn your nails into a tiny garden that blooms all year long.
In this post, I’m sharing 5 must-know floral nail art techniques that work for any season. Whether it’s sunny summer, cozy winter, or fresh spring, these flower designs will fit your mood and your outfit. Grab your polishes, a dotting tool or even a toothpick, and let’s get started. You’re about to become your own favorite nail artist.
1. The Simple Dot Flower – Perfect for Beginners

Let’s start with the easiest technique in the book. The simple dot flower uses nothing more than a dotting tool or the back of a bobby pin. Paint your base color and let it dry. Then dip your tool into a contrasting polish (white on pink, yellow on blue – anything goes). Make five dots in a circle, then add a center dot in a different color. That’s it. You just made a flower.
One of the 5 must-know floral nail art techniques that work for any season is this dot flower because you can change the colors to match winter berries, spring pastels, summer neons, or autumn rusts. Use it on every nail or just one accent finger.
Save worthy tip: Space your dots slightly apart instead of touching. When you add the center dot, it pulls the design together perfectly.
2. The One Stroke Rose – Wild & Funky Elegance

Ready to level up? The one stroke rose sounds fancy but it’s actually a playful mess in the best way. Load a flat brush with two different polish colors side by side (like hot pink and white, or coral and yellow). Then paint a series of curved “C” shapes in a circle, overlapping as you go. The colors blend on their own and create a rose that looks incredibly detailed.
This is one of those Floral Nail Art Techniques that feels wild and funky because each rose turns out unique. No two are ever the same. Practice on a plastic lid or piece of paper first. After three tries, you’ll be addicted.
Save worthy tip: Don’t overwork the stroke. Two or three swipes per petal is plenty. Let the brush do the magic.
3. Watercolor Blooms – Soft, Dreamy & Romantic
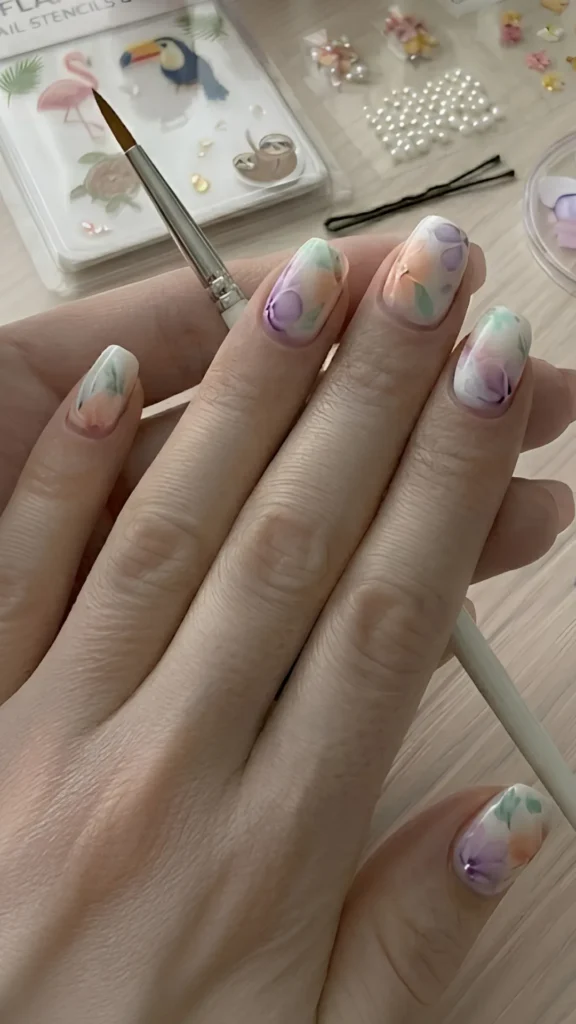
Love that soft, painterly look? Watercolor flowers on nails are surprisingly simple. Paint a white or nude base. Then take a small amount of polish (say, lavender or peach) and thin it with a drop of nail polish thinner or even a tiny bit of acetone. Use a fine brush to dab and swirl the color into soft petal shapes. The edges will look faded and dreamy, just like watercolor on paper.
When you’re exploring 5 must-know floral nail art techniques that work for any season, watercolor blooms are perfect for spring weddings, fall date nights, or winter holidays when you want something ethereal. Layer two or three colors for depth.
Save worthy tip: Work one nail at a time so the polish stays wet enough to blend. If it dries too fast, add a tiny drop of clear polish to reactivate it.
4. Layered Petals with a Liner Brush – For Full, Dramatic Blooms
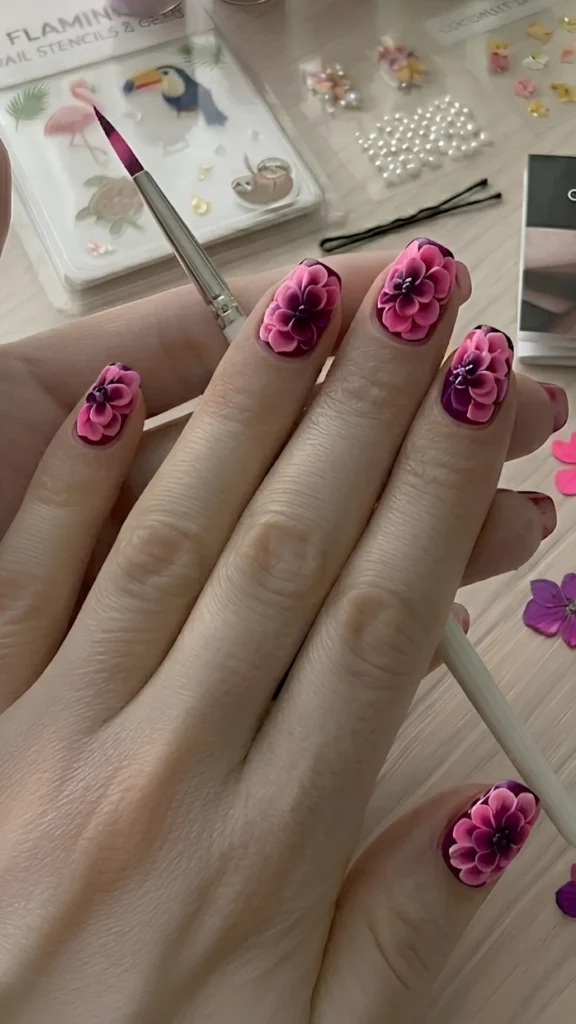
Now we’re talking serious flower power. Use a thin liner brush and start with a small center dot. Then paint petal shapes around it, one layer at a time. Start with darker petals in the center, then lighter petals on the outside. This creates a full, dimensional bloom that looks like it could be on a fancy cake or a high end fashion accessory.
This technique belongs in the 5 must-know floral nail art techniques that work for any season because you can adjust the petal shape – round for peonies, pointy for daisies, long for orchids. For wild and funky vibes, try neon pink petals with a dark purple center. It’s bold, it’s loud, and it’s gorgeous.
Save worthy tip: Clean your liner brush after every 2 3 petals. Even a tiny dried polish lump will ruin your lines. Keep a small cup of acetone nearby.
5. Negative Space Florals – Modern, Minimal & Chic

Not every floral nail needs to cover the whole nail. Negative space designs leave parts of your natural nail bare, and they look incredibly cool. Paint a clear base coat, then use a striping brush or toothpick to draw thin flower outlines – just the petals and center, no filling. You can also paint a single bloom near the cuticle and leave the rest of the nail bare.
Among all Floral Nail Art Techniques, negative space is the most versatile. It works for every season because it’s subtle enough for work but artistic enough for parties. Try black outlines for winter, pastel outlines for spring, or neon outlines for summer. Add tiny leaf lines to complete the look.
Save worthy tip: Use a matte top coat over negative space florals. The contrast between shiny bare nail and matte painted lines looks super expensive.
Now it’s your turn. Which of these 5 must-know floral nail art techniques that work for any season are you trying first? I’d love to hear about your favorite flower designs or any questions you have. Drop a comment below, share your nail art photos, and come visit donutnail.com for more wild & funky tutorials, step by step videos, and product recommendations. Let’s fill the world with floral nails, one fingertip at a time.
Learn Floral Nail Art Techniques from simple dots to full blooms. This post gives you 5 must-know floral nail art techniques that work for any season. Save for your next DIY mani #FloralNailArt #NailArtTechniques #DIYNails
Table of Contents
You might also Like: 10 Nail Art Hacks That Professionals Don’t Want You to Know (Try #7 Today!)

